Showing posts with label paint plan. Show all posts

Monday, July 20, 2009

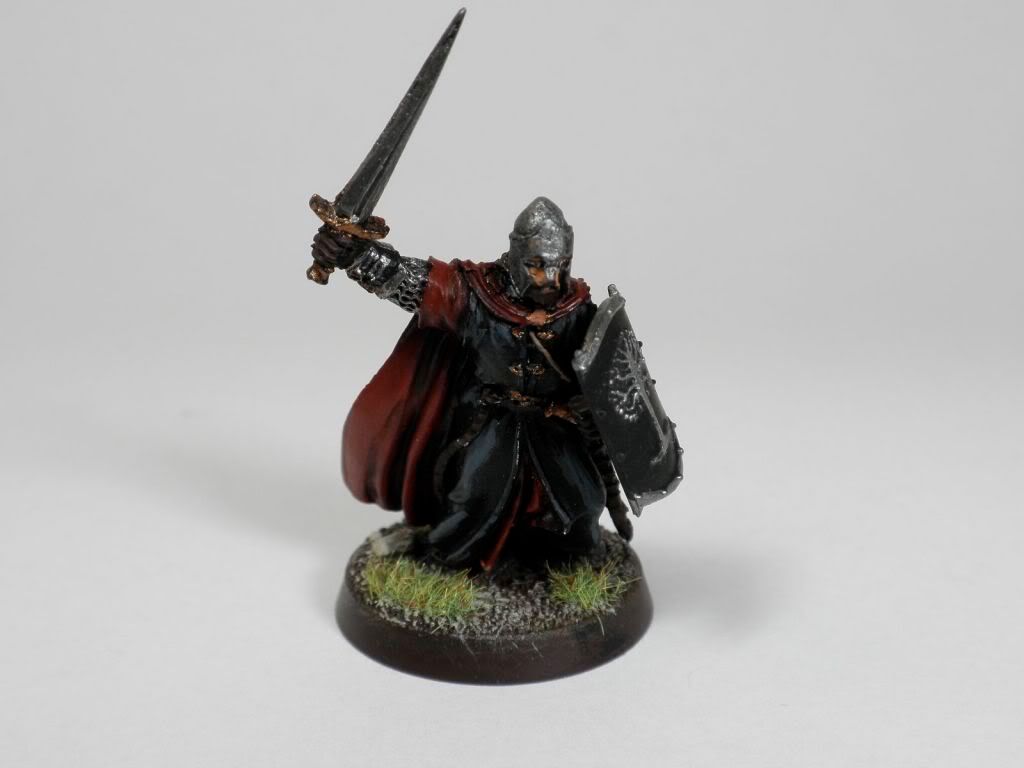
Highlights on Ecthelion

I finished highlighting Ecthelion, taking a different tack from what I'd done with the Warriors. With the Warriors, I had done some pretty subtle stuff, then washed them, and found that I couldn't actually see the results as much different from a single basecoat and a wash. Too much work for not enough return.

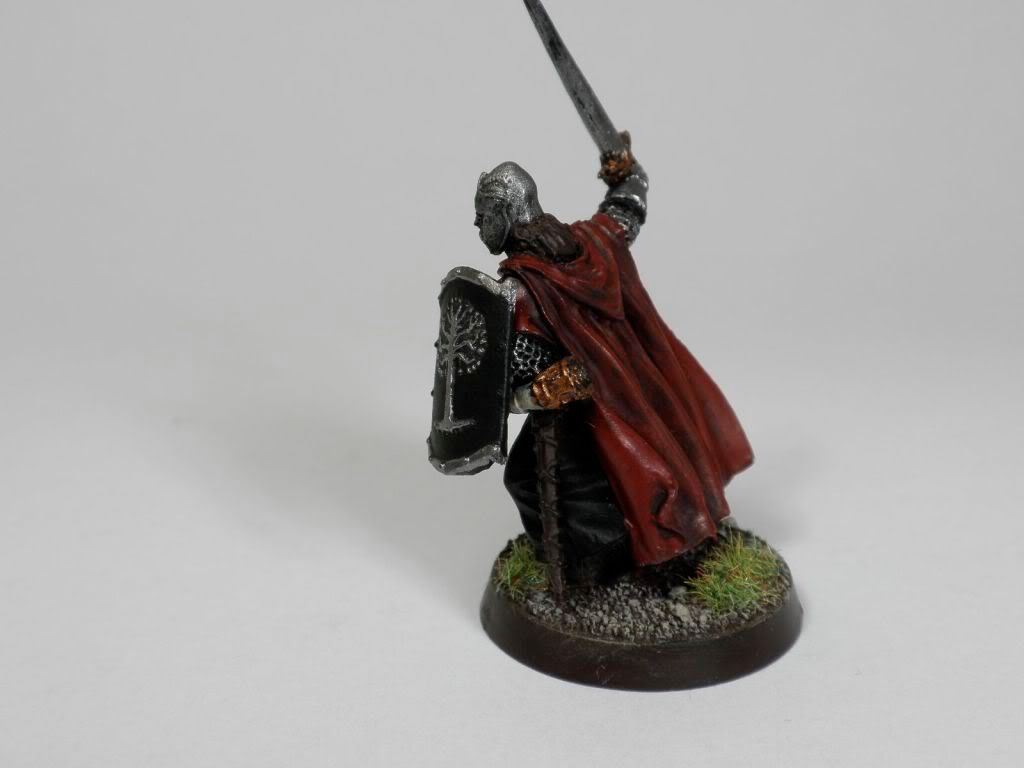
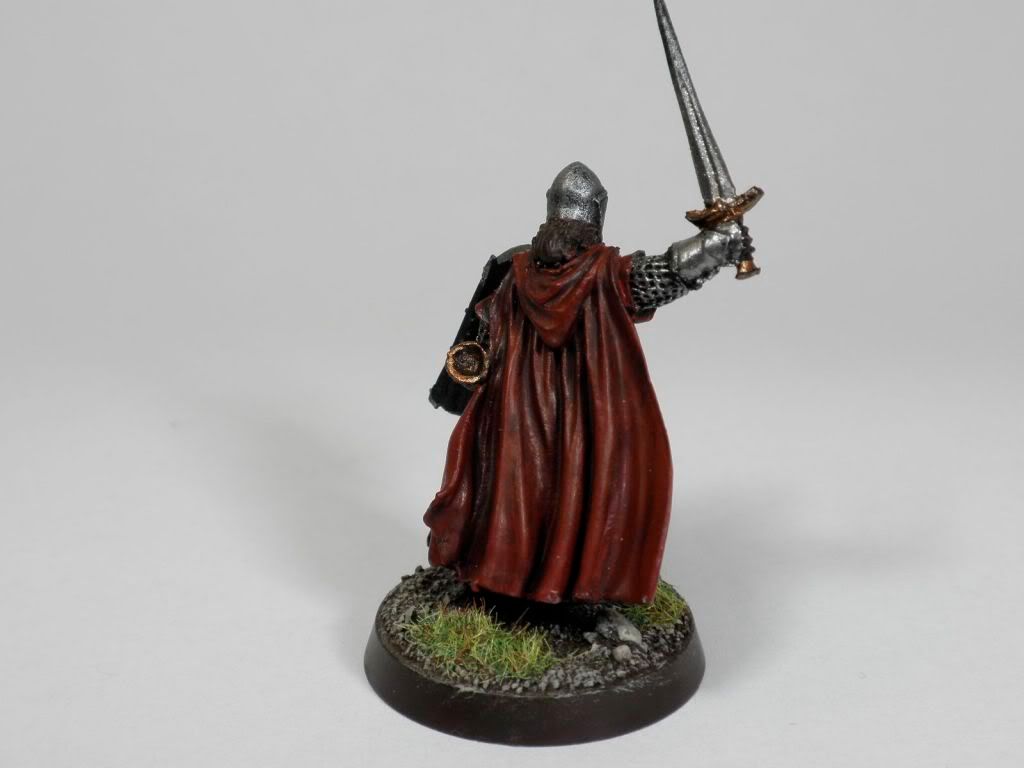
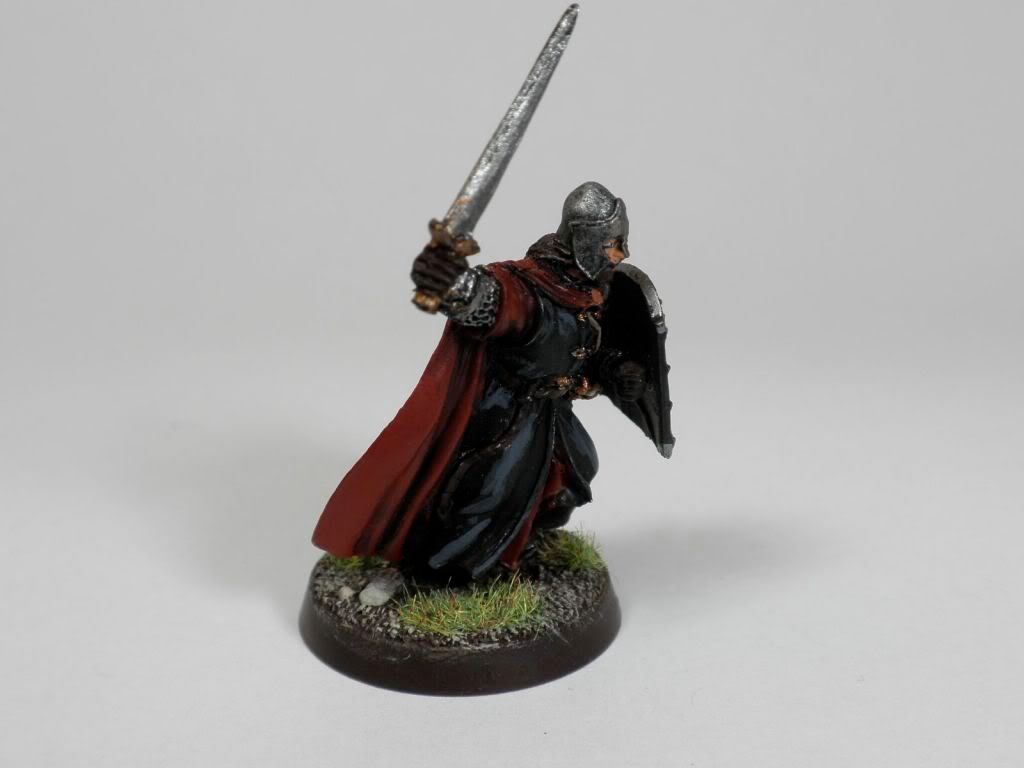
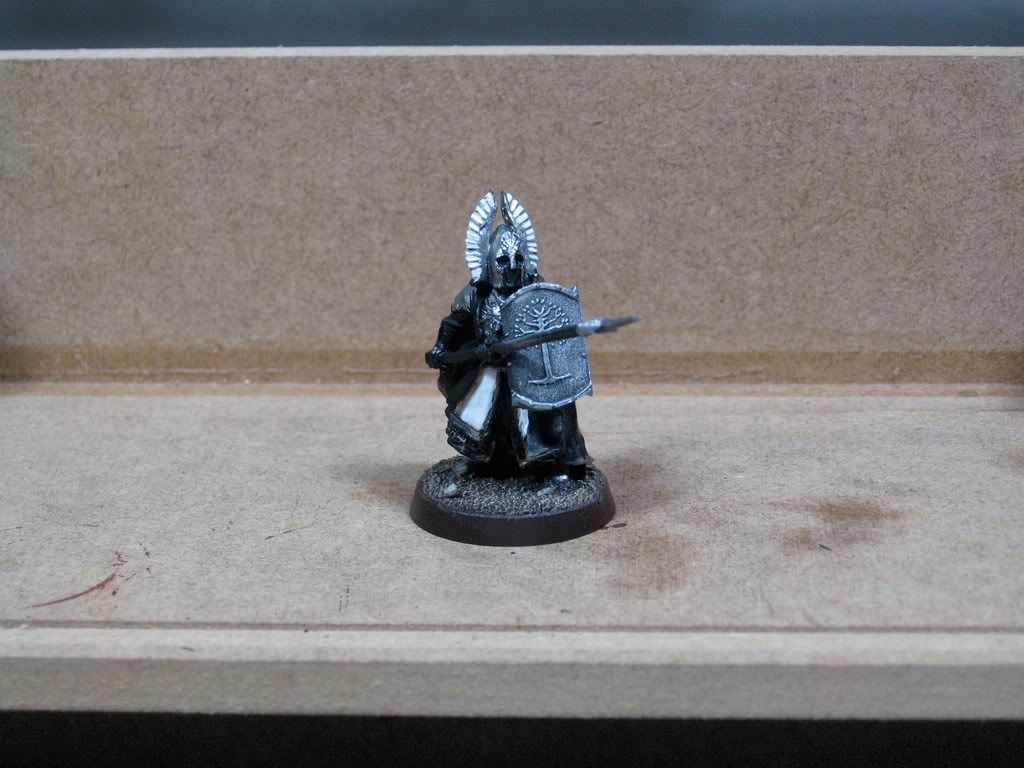
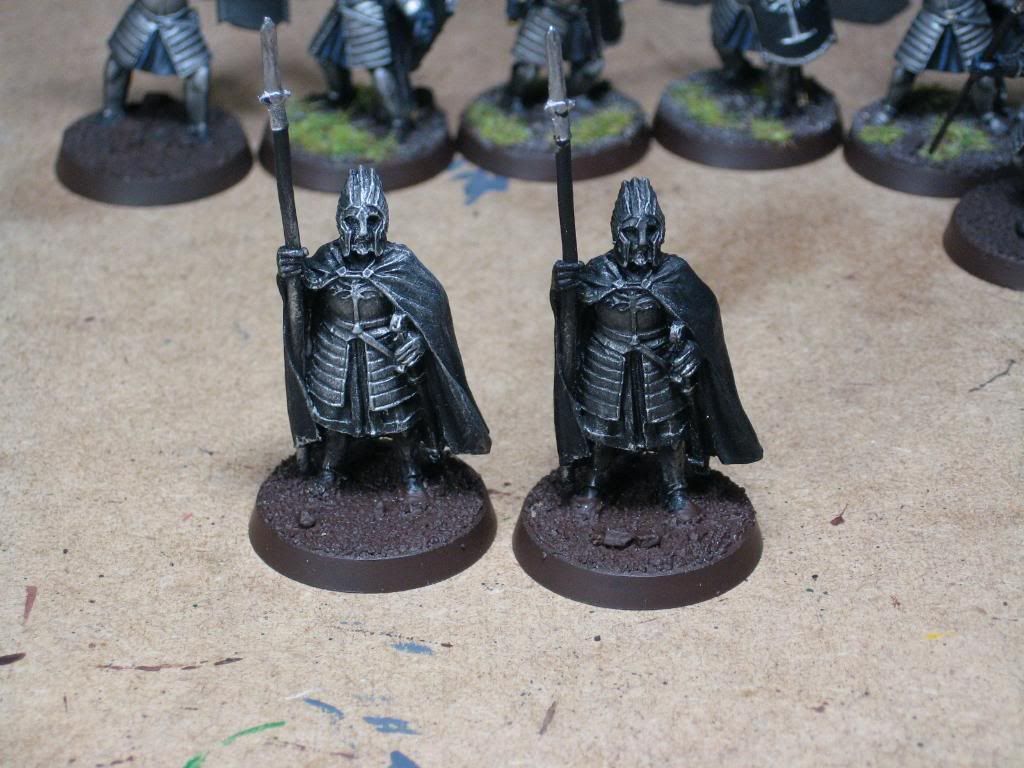
So here was Ecthelion before the new work. I had done a similar technique to the Warriors with the cloak, but you can see the rushed single highlight on the black tabard. This picture was taken using my daylight bulbs.


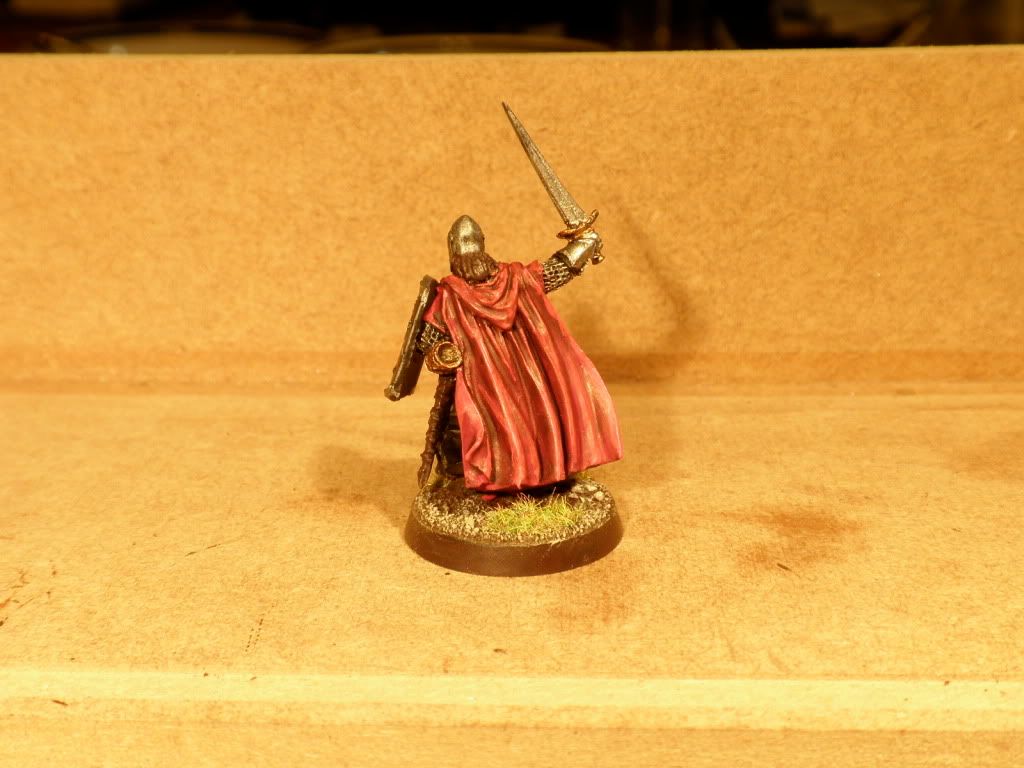
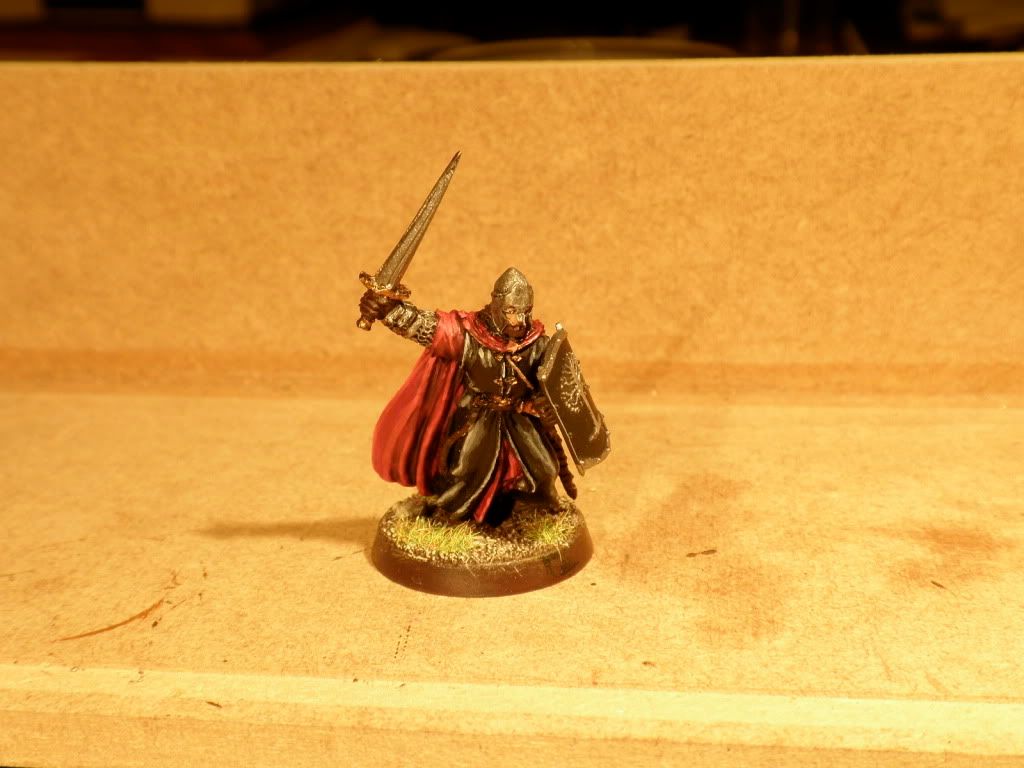
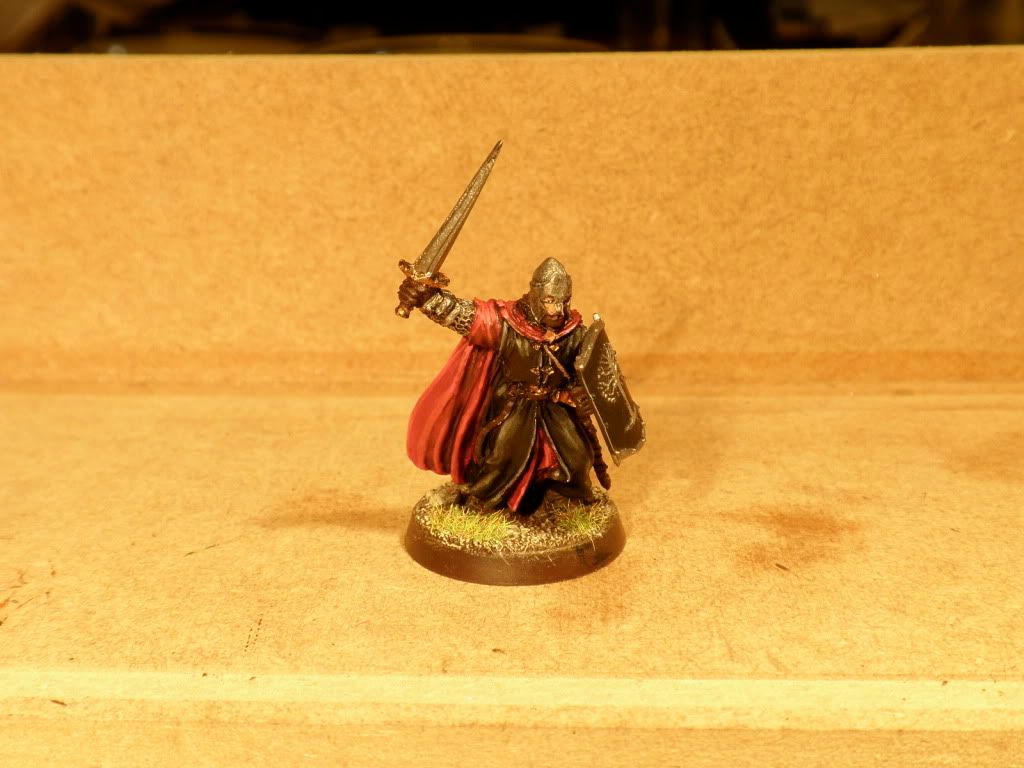
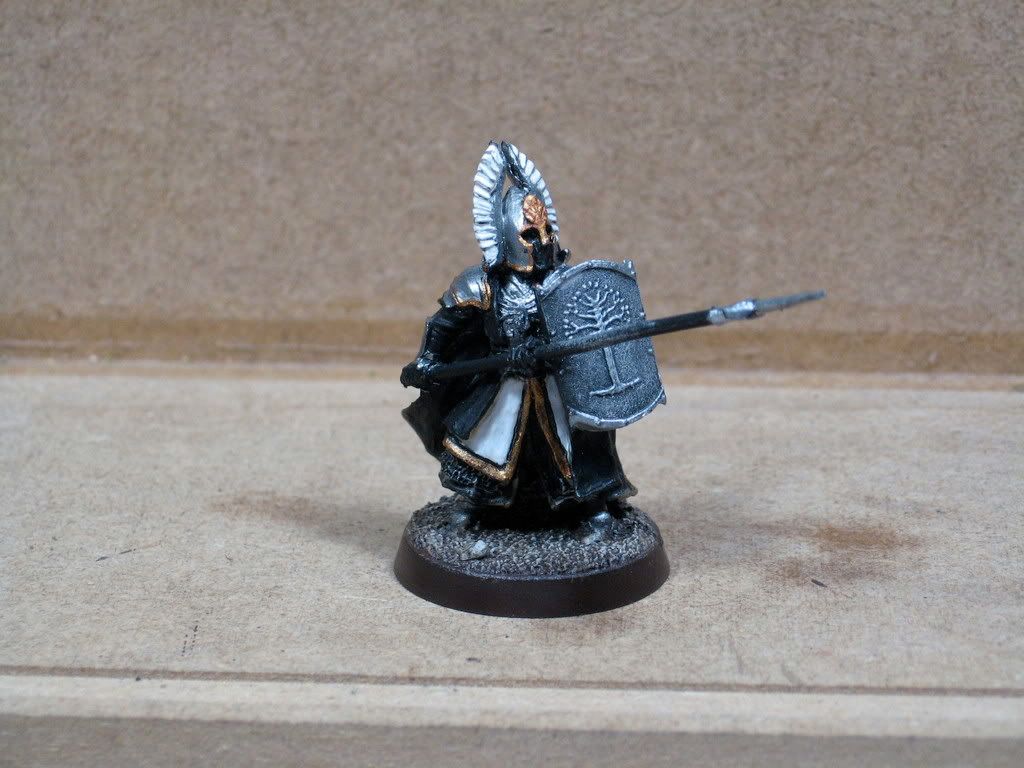
The first thing I did was go over the top of the cloak's ridges with a straight Blood Red. The cloak was built up from several layers of thinned down Scab Red and Red Gore, then I washed it with a light black wash. The Blood Red highlight really popped out the cloak. The pictures below, taken with my halogen lights, don't show this really well - it has kind of pixelized the paint job.


Next I laid two stark highlights onto the tabard. The first highlight I think was Adeptus Battlegrey, so the second and third highlights were Codex Grey and Fortress Grey respectively. You can see this results in a very stark highlight, almost making the black look striped.


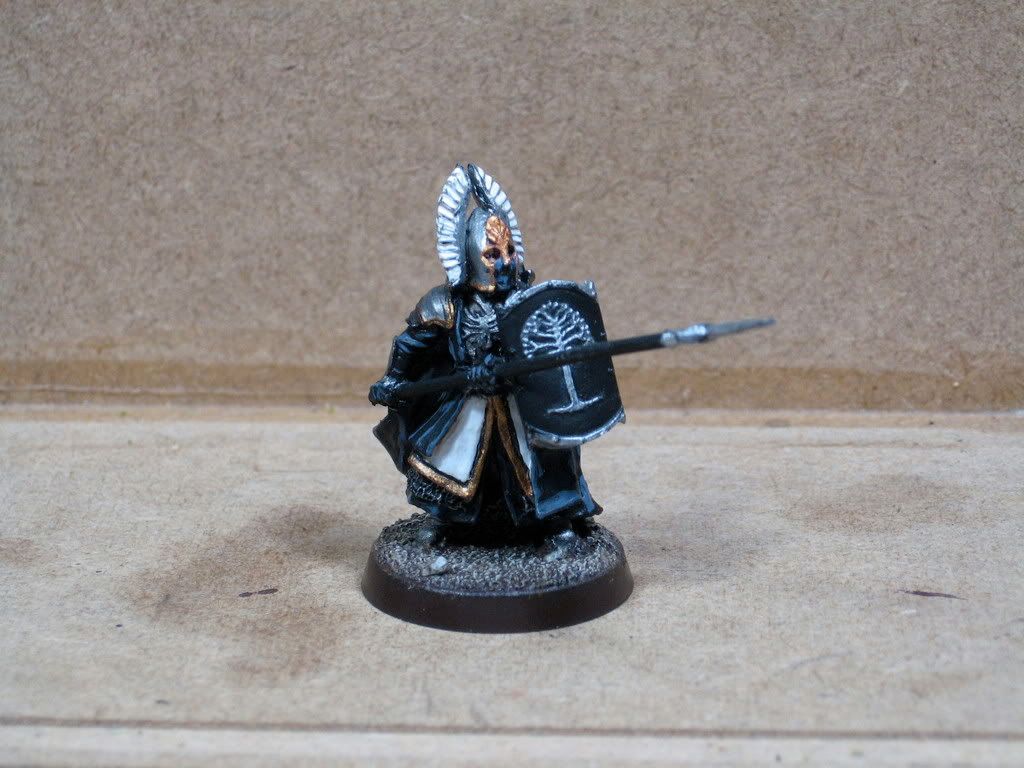
While this did make the model pop, it was TOO over the top to fit in with the rest of my force. So I decided to give the black a heavy wash of Badab Black. When I first put it on, I didn't really see any difference. But when I came back and looked at it this morning, it had dried and smoothed out the stark highlight very nicely. So I think I'm going to stick with this method for the Guards of the Fountain Court's cloaks as well.


The main thing that this experience is showing me is how much I already miss my daylight bulbs. I need to figure out some way to jury rig my lights for the dining room table area I have to use now.

Sunday, July 19, 2009

All of the warriors cloth highlighted


So there is the cloth of all the warriors highlighted with one more level. This layer really makes the models pop, and brings the number of layers to five. This one is less subtle than the others, but it just works better. Now I can make out fingers, folds in the cloth, and the fact that there IS cloth in some less obvious places.

The lighting is a little different - earlier I had daylight bulbs in two task lamps which attached to my painting table with C-clamps, but now that room is the nursery and the table has been folded up and stored. So now I'm at the kitchen table and back to my halogen desk lamps. They have a different color light, so that's why the pics look different.

Next up: highlighting the cloth of Ecthelion, then I think I'll do the Guards of the Fountain Court. If I've got enough time after doing them, I'll base and prime five more rangers to replace the metals.

Wednesday, July 8, 2009

Bright is beautiful

I keep coming back to the basics that I learned back in the day, and they hold up over time. In this case, don't be afraid of big, bold highlights.

With this army, I really wanted a realistic, subtle look. I wanted the cloth to clearly be black, but highlight it with a tint of blue to match Gandalf. Plus all of that grey and silver would be really boring.

Sadly, I went too subtle, and you couldn't see the highlights outside of highly exposed web photos. So I went back and put a bold highlight that finally accomplished what I wanted.


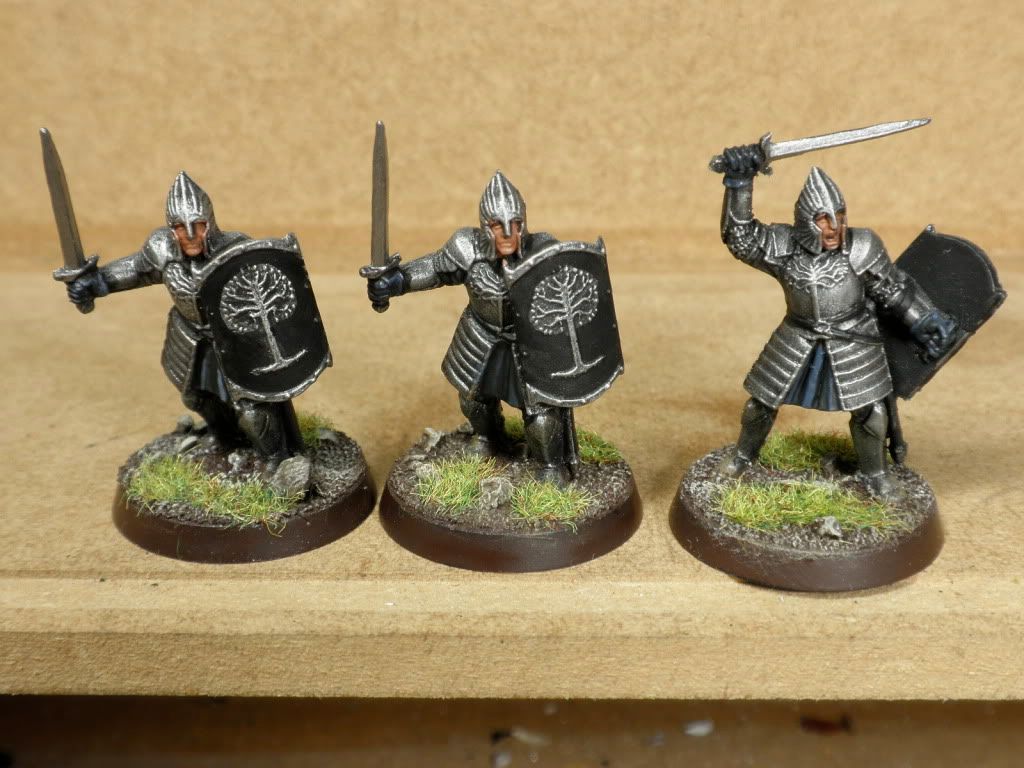
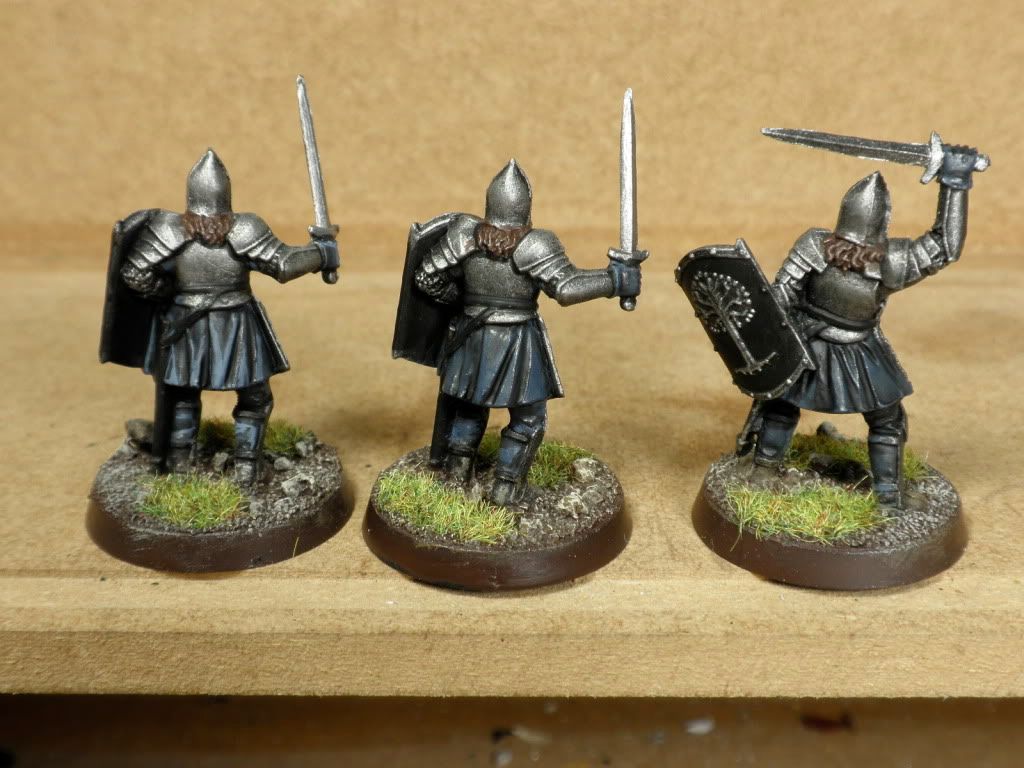
On the right is a model that I haven't touched since the Gathering. This was one of the ones with the most obvious, bright highlights. Yeah, I'm not sure that either of those terms apply there. The middle one is a model that I've black lined, which did help a little, but didn't make up for the dark highlights. The left is one I just finished highlighting the cloth with Shadow Grey. MUCH better. Don't let the chunkiness of the highlights fool you - when they aren't in the bright light and up close, those highlights really make the model work.


This back picture is a much clearer one of how well the highlights work. Notice the blacklining I put in place around the hair, armor plates, and between the armor and cloth. Combined with the bright highlights, that really works.


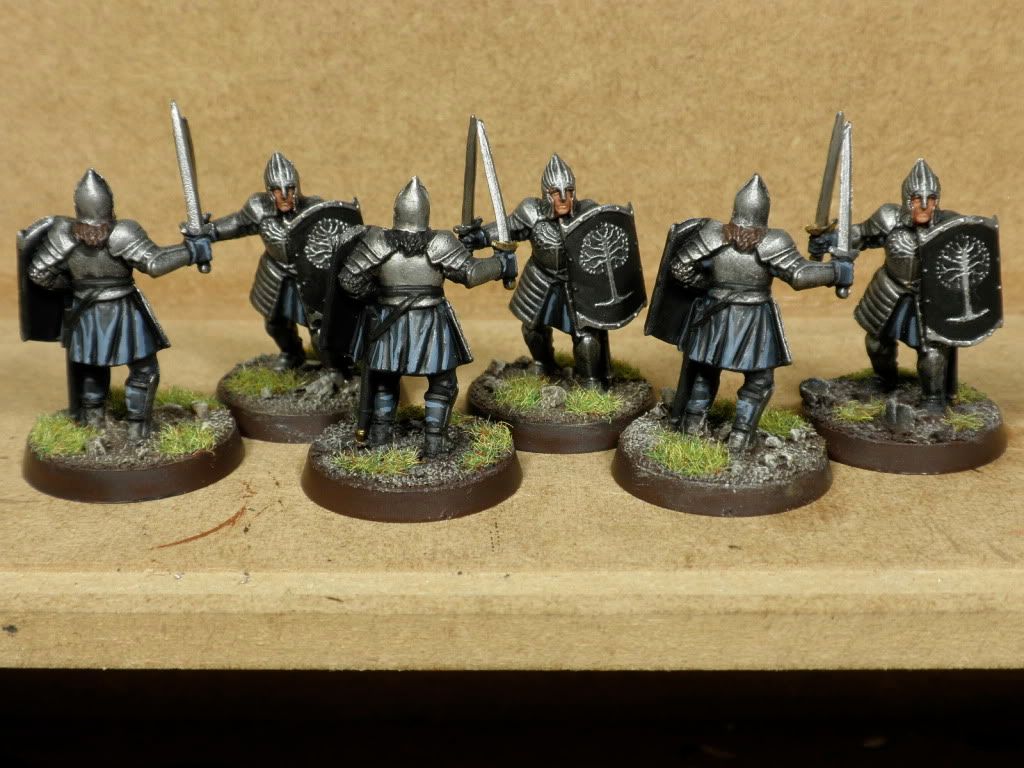
And here are all of the warriors of this pose highlighted with the new cloth highlights and blacklining. I currently have the lights off in my work area and am looking at the models with ambient light, and the difference is striking. The unhighlighted models are flat and dark, while the highlighted models, while still kind of dark, are much more dynamic.

Oh, and I figured out why my new camera wasn't taking bright pictures. Since I don't have a manual shutter speed setting, it was taking an overall view of how much light was coming in. With the background being white, that told the camera it needed to have a much faster shutter speed! Now I feel dumb.

Tuesday, July 7, 2009

Let's get cracking - Update paint plan

Time is started to get tight, and I need to get my plan on paper if I'm ever going to get this done. Ur, well, on screen, blog, disk, whatever. I need to write it down.

The two weakest areas are highlighting and details. The basics on all of the models are strong, but that isn't going to get me into the top 5 painters. The weakest models are the rangers, and the slight mix of the two styles isn't helping anything. So here is my general plan:

Rangers:
- Shadow and black line models
- Add two layers of highlights, ending with a 50/50 mix of Snot Green/Dark Angel Green in the green areas, still need to figure out colors in the browns
- Highlight skin, including fingers

Warriors:
- Black line details
- Highlight details (belts, hair, etc)
- Add top cloth highlight in Shadow Grey - if not light enough, add another in 50/50 Shadow/Space Wolf Grey
- Try to highlight obvious parts of face (chin, cheeks)

Guards of the Fountain Court
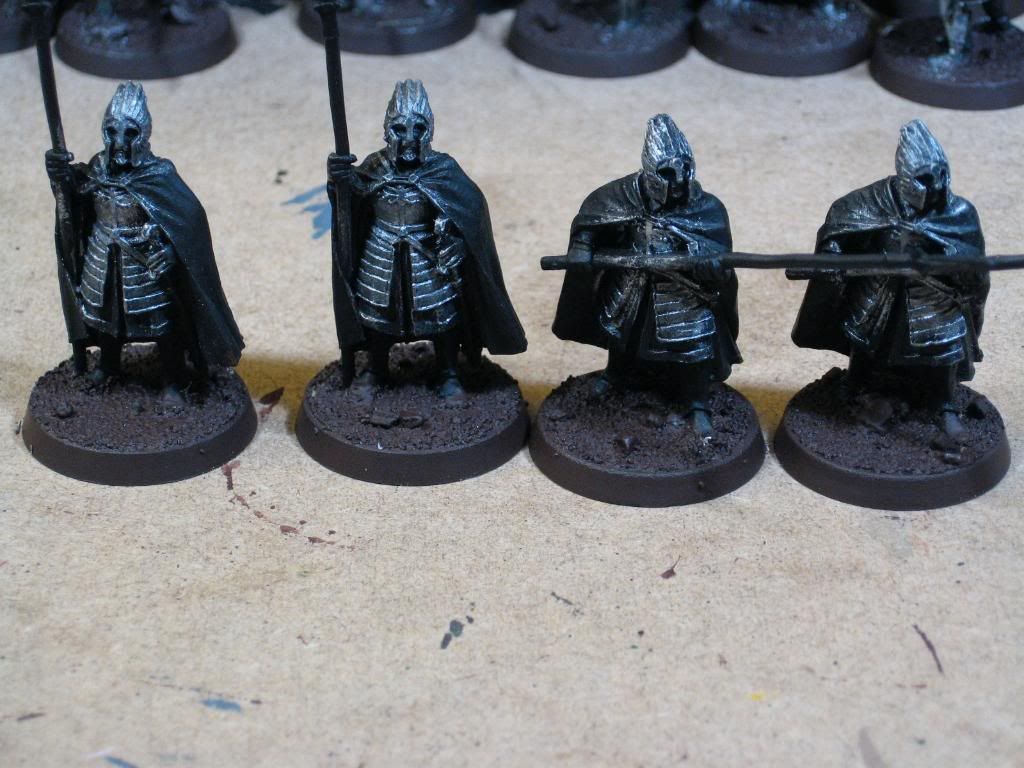
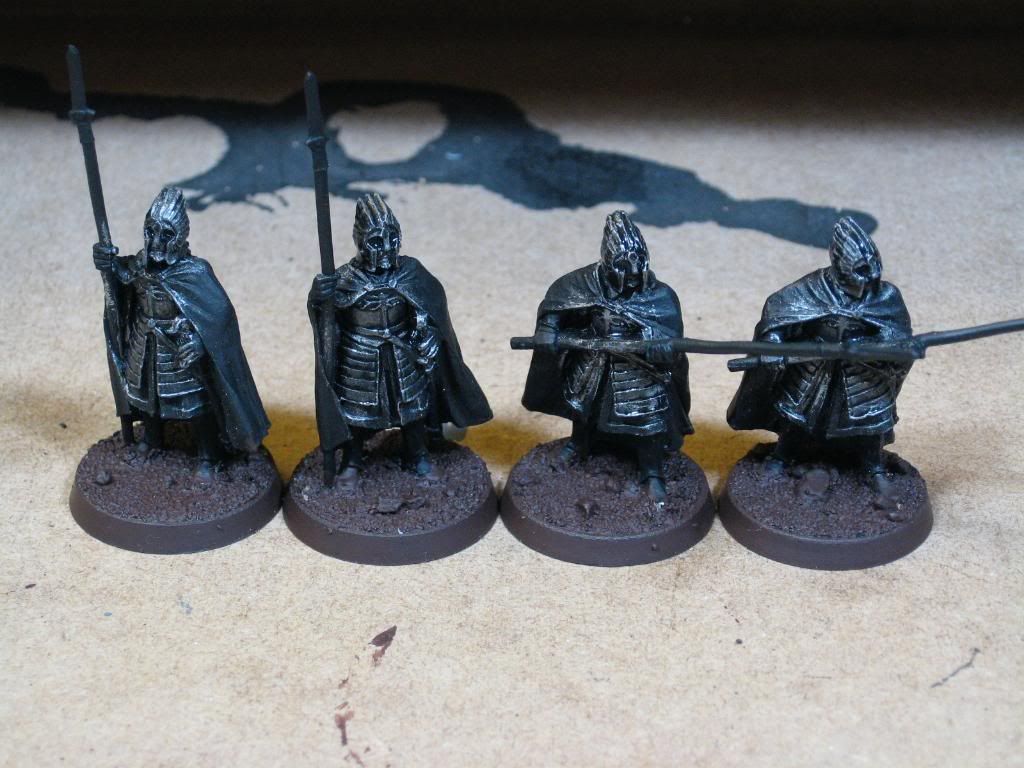
- Add two levels of highlight to cloth, ending in Fortress Grey, then wash with black
- Highlight details
- Add designs to tabard
- Add trim and design to cloak
- Add gold trim to helmet

Ecthelion:
- Add two levels of highlight to cloak, ending in Blood Red
- Add two levels of highlight to cloth, ending in Fortress Grey, then wash with black
- Highlight face
- Paint then highlight details like scabbard, belt, horn, helmet

If I get this stuff done before the event, I'll paint up five new plastic rangers to replace the metal ones with the slightly different painting style. I'll see how far I get on the warriors tomorrow - I'd like to have all of this done by next Wednesday.

Thursday, July 2, 2009

Updating the Errand

I recently got a new digital camera (primarily to take pictures of the baby with!), but I decided to see how it works for photographing minis. Not bad, but I do kind of miss the manual settings I could use on my old one. Of course, I don't miss the old camera's far left hand tripod hole (ALWAYS drooping on the tripod!), and I really like the macro settings on the new one - The pics of Gandalf and Ecthelion were taken from a couple inches away, something I couldn't do with the old camera.

Without the manual shutter settings, it does mean it's harder to make out contrasts and the like. However, I am also noticing that the pics look more like the models do in real life and on the table, where my earlier pics were so bright and clear that they sometimes looked better painted than they really were. So for my purposes today, the new camera works better. Also remember that each picture can be clicked on for a larger view.

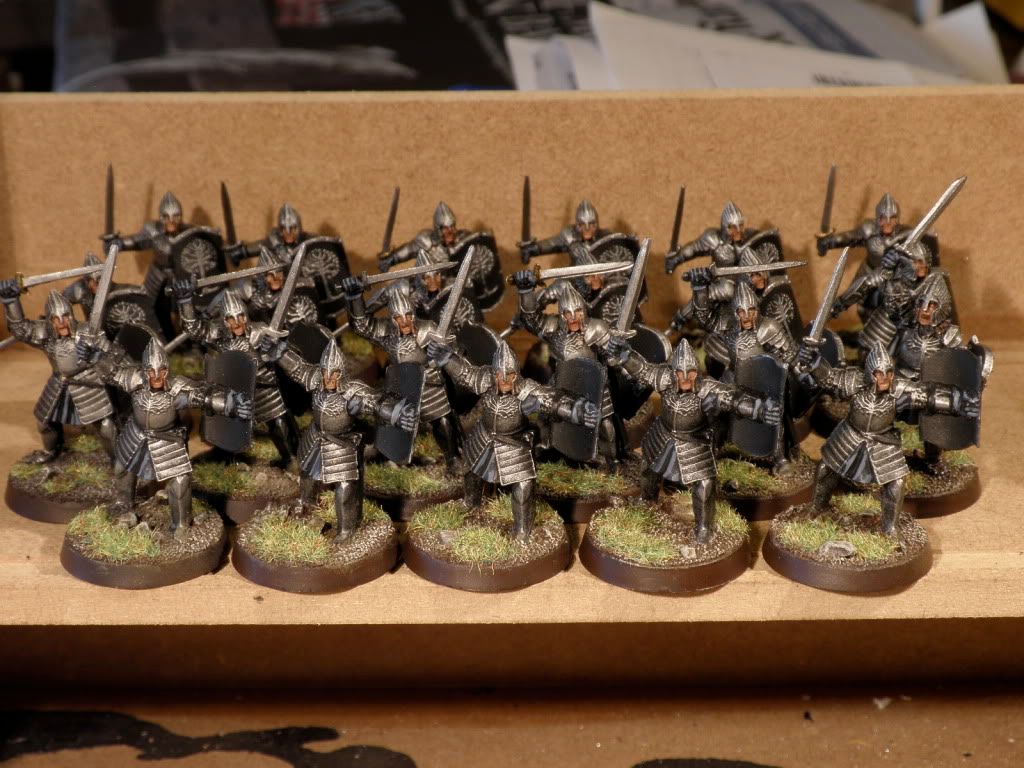
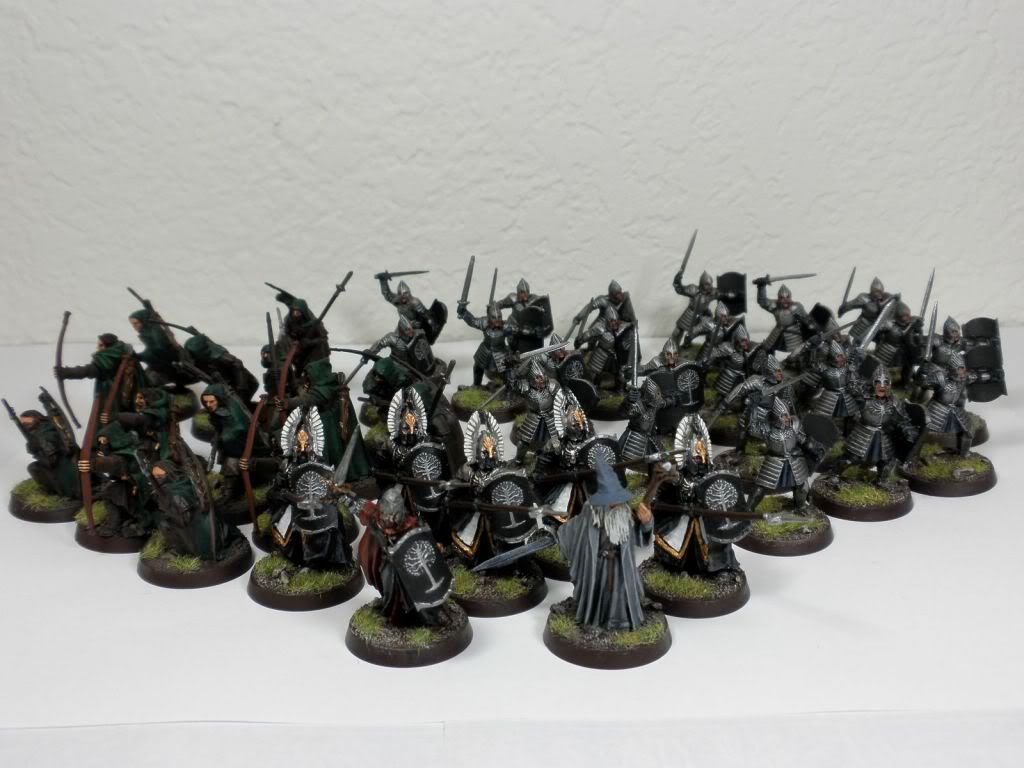
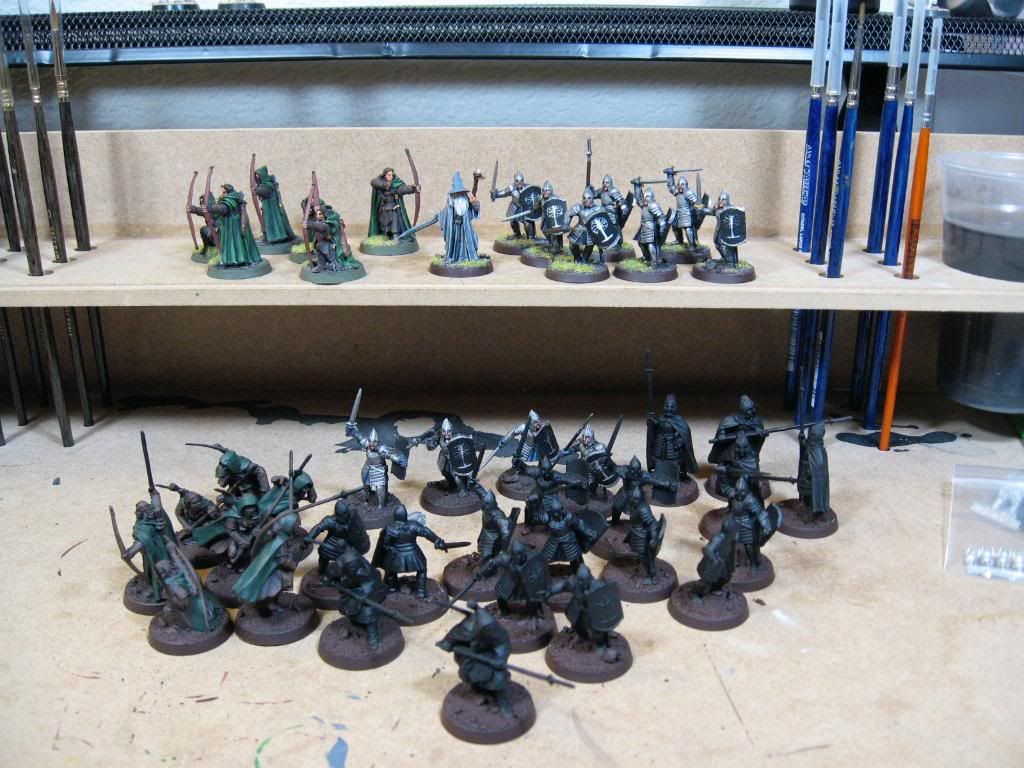
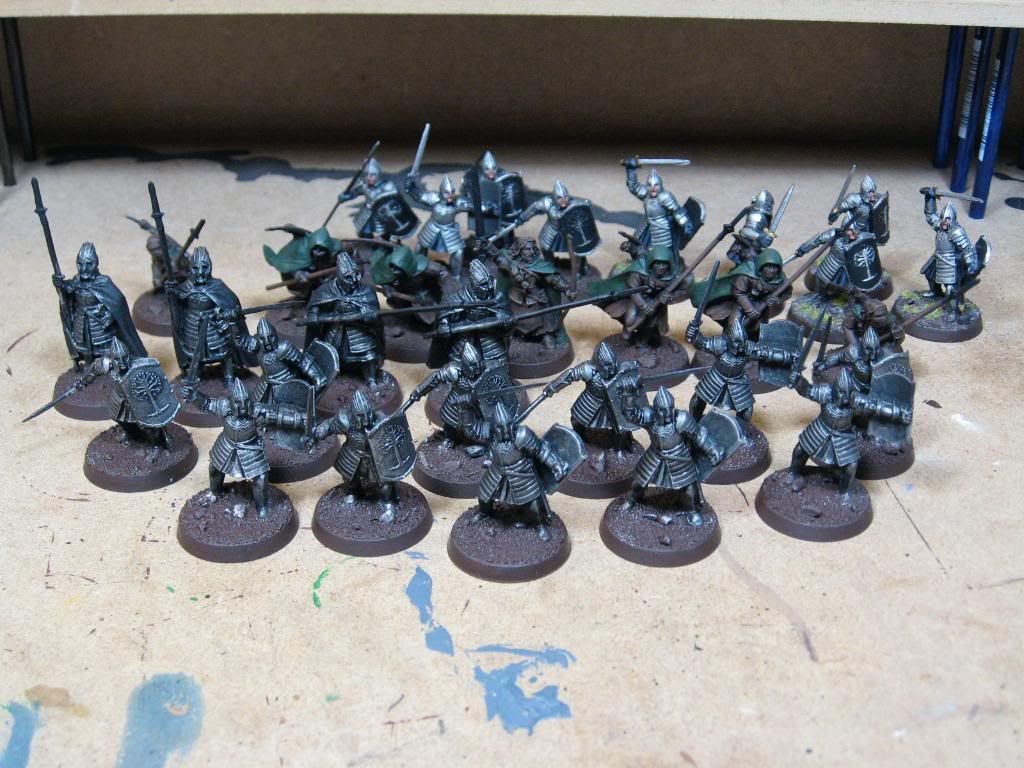
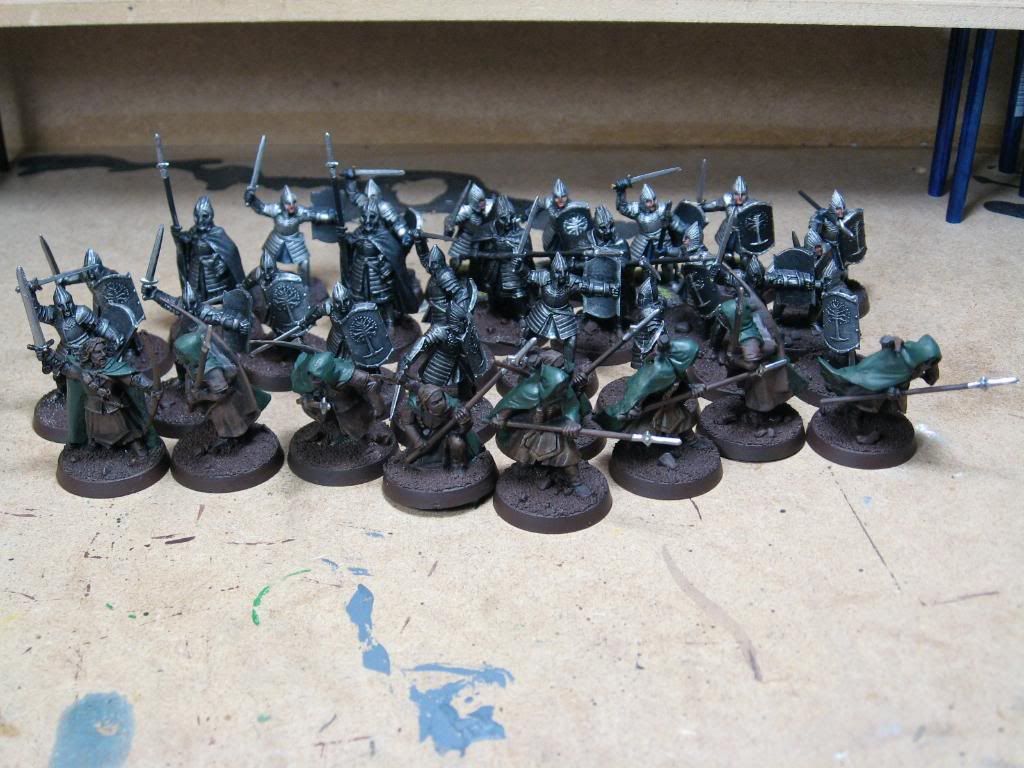
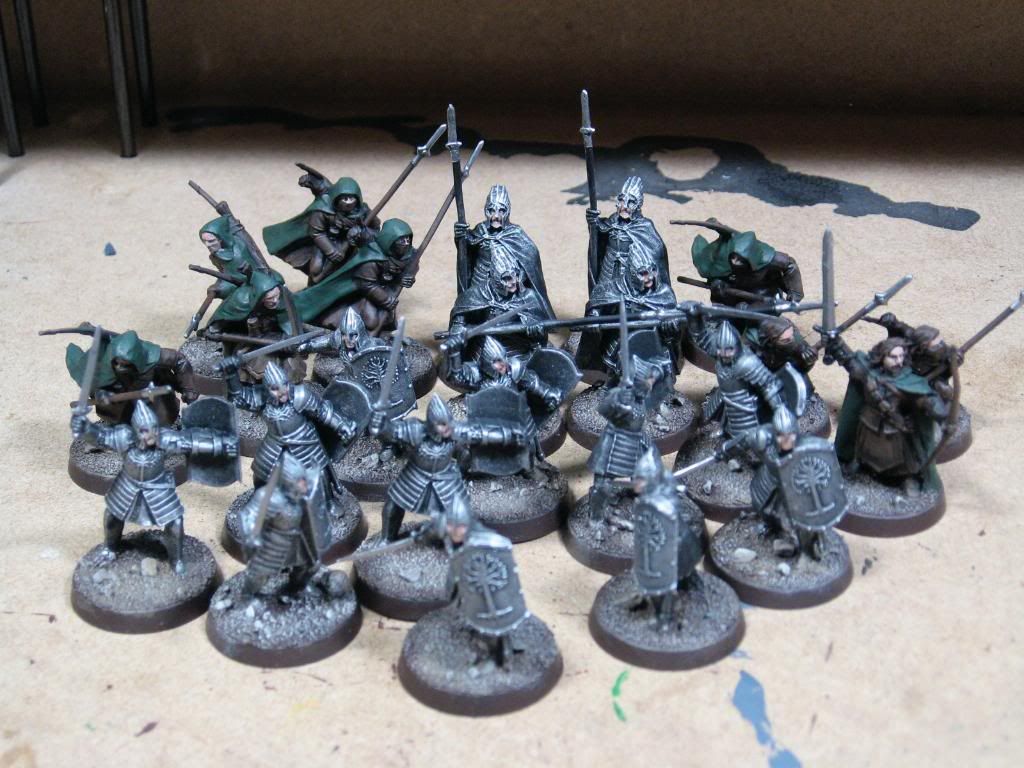
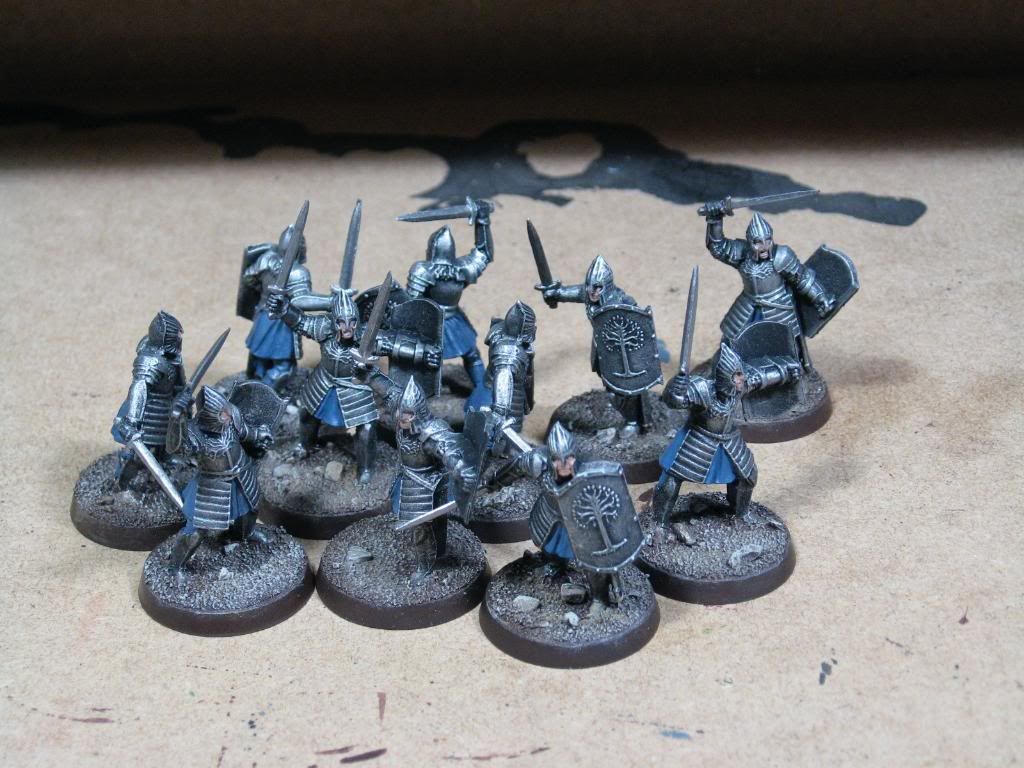
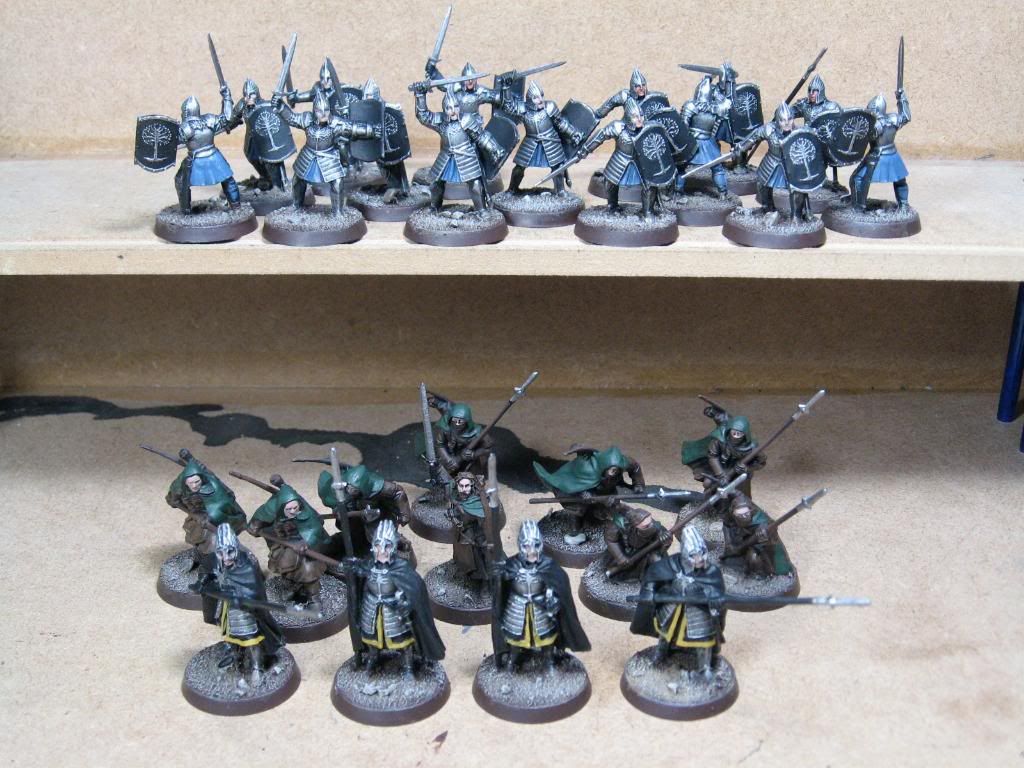
So this is the overall army. My general painting style tends to be subtle, and on the whole I think this looks pretty good on the table. The earthier tones holds it all together, and there is a lot of black and brown. The individual groups definitely tie together - green for the rangers, a blue/grey for the warriors, white for the Guards, and red for Ecthelion.

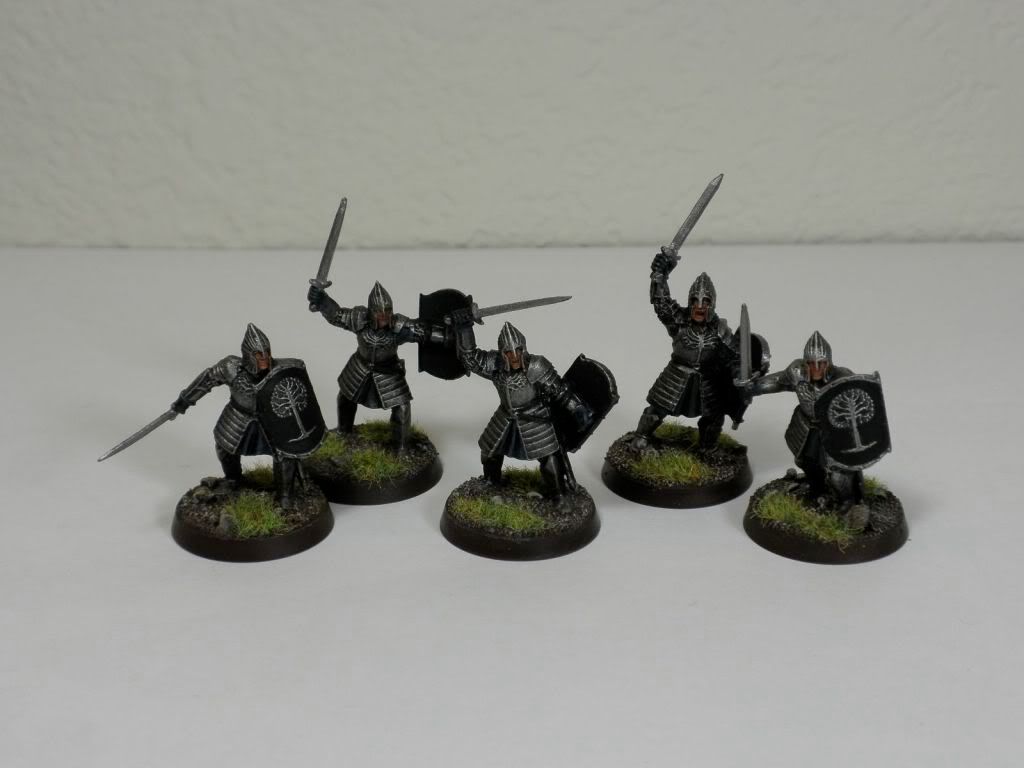
Where this starts to fall apart is in the details. OK, that and I didn't put enough time into painting last time. I'm afraid I'm going to need to step the highlighting up - believe it or not that is three layers and a wash on the cloth, but the low steps in color make it all wash together, resulting in a less highlighted effect. I also need to highlight the details like the belts, hair, and possibly even the armor and hair. Some blacklining of details wouldn't be a bad idea, either.

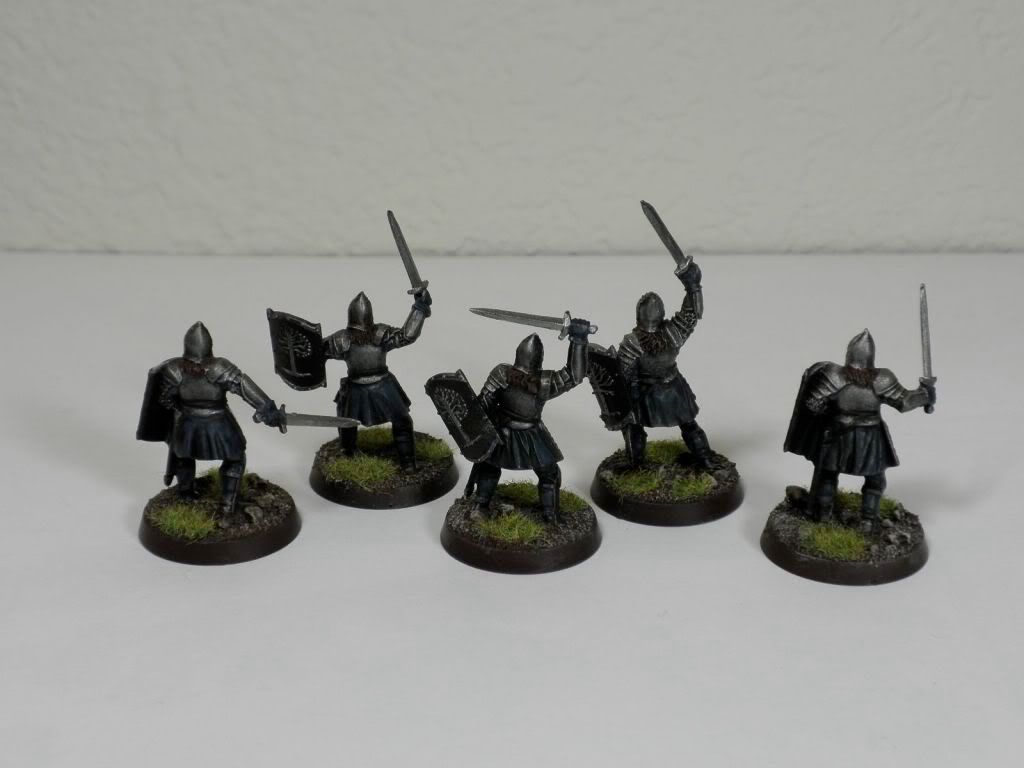
Back shot of the warriors - the cloth is a little clearer, but you can see the unhighlighted belts and hair.

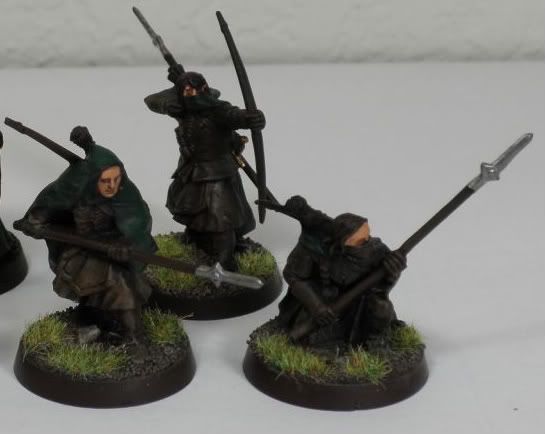
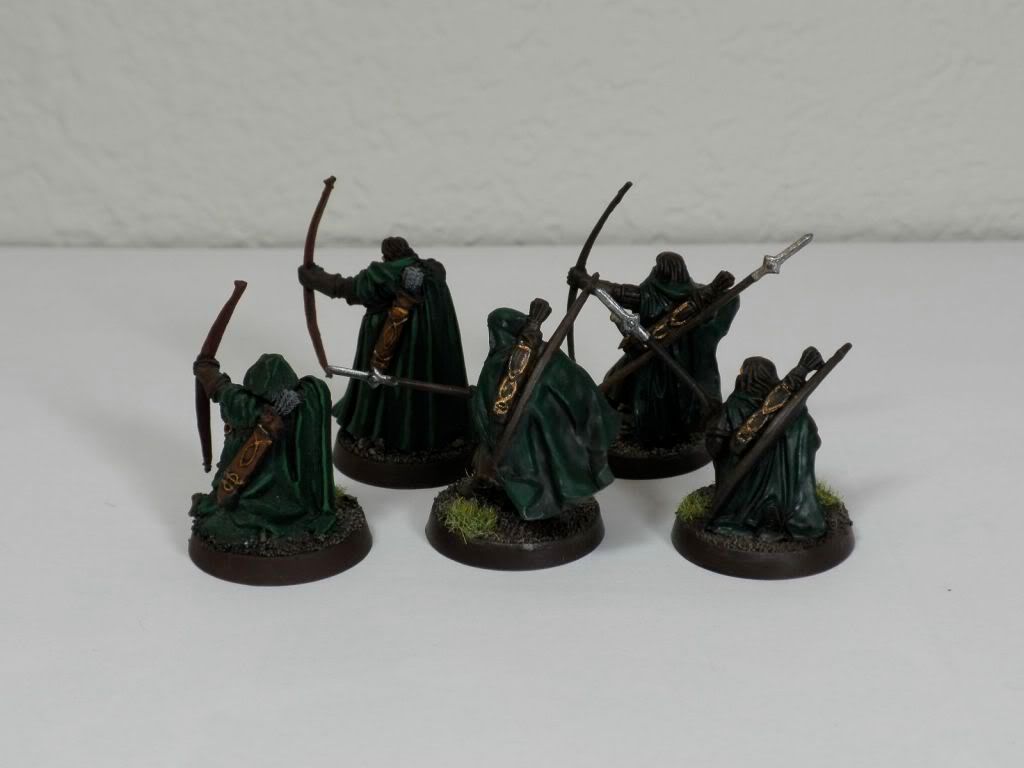
Here are the rangers. There's a little inconsistency here - I painted the metal rangers on the left some four years ago while working for GW. I don't remember the exact colors, and the foundations weren't available yet. But you can see there is better highlighting, the skin is better, and there is a broader range of colors within the palette. The browns all wash together on the newer models instead of having a more noticable line. I was really, really rushed on these guys.

It's a little more obvious how rushed I was on the back. The old models have nice highlighting on the cloaks, while the new ones were just block painted and washed. I also didn't use any highlights on the quivers.

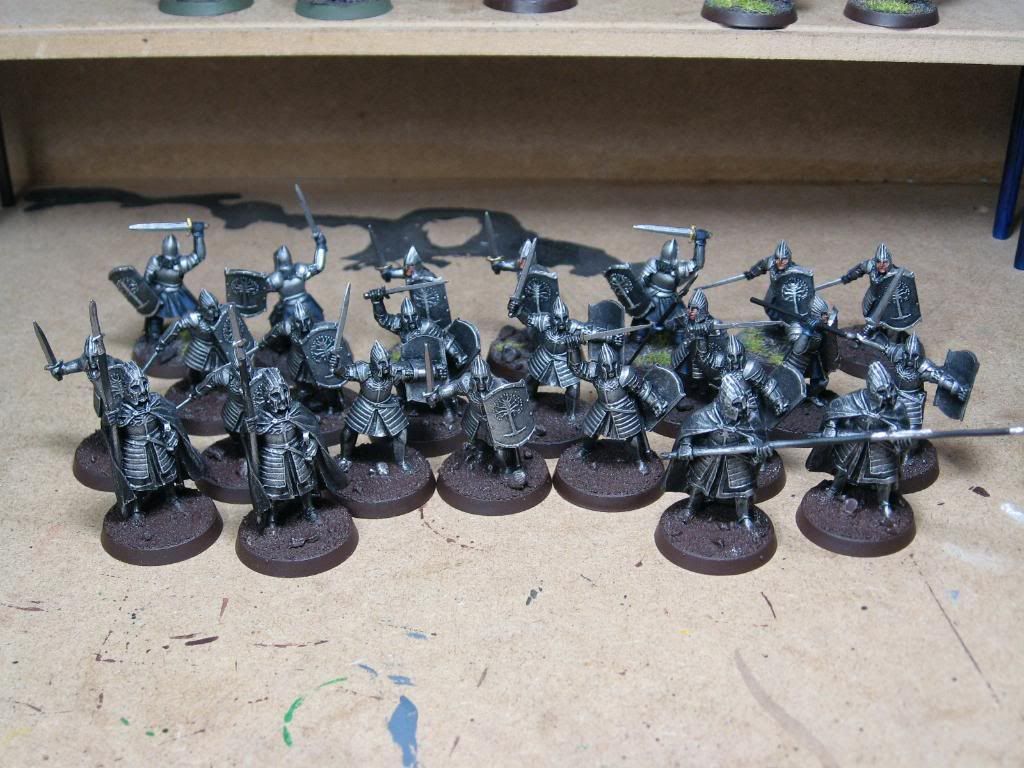
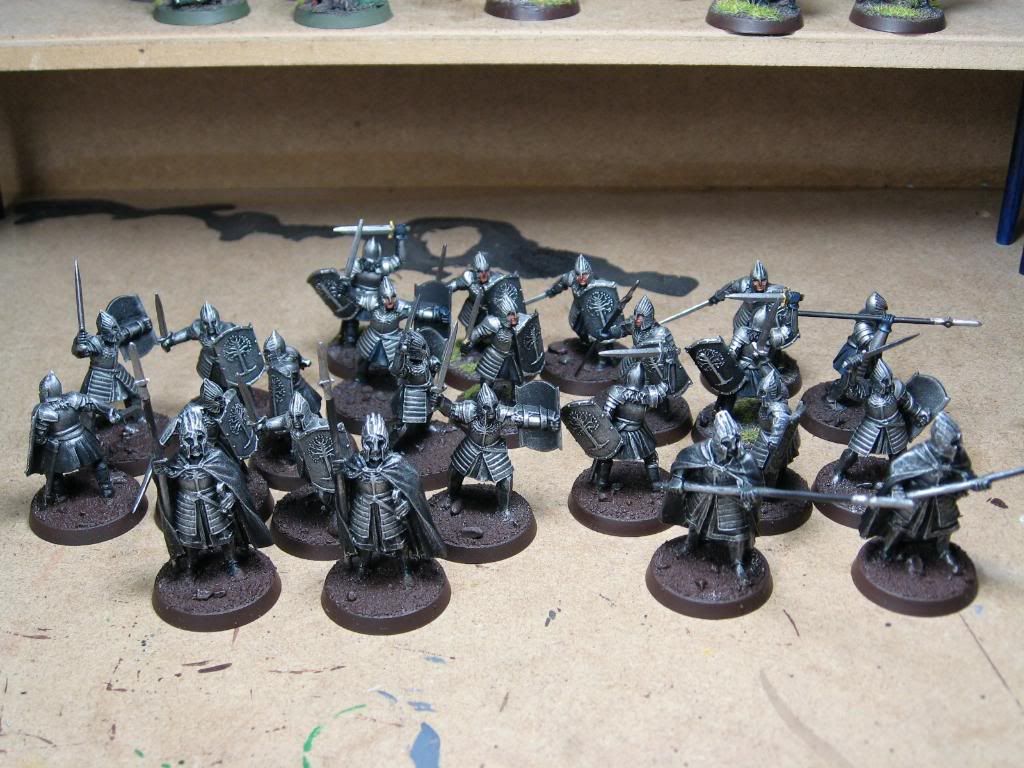
These guys look pretty sharp from the front. That white was a pain, but the blacklining works nicely. I think I'm going to use a Micron pen to add a design on the tabard edge, and possibly put a decorative yellow and black edge on the cloak as well. Some gold details on the helmets might also work nicely.

The cloaks are another story. Single grey highlights that look slapped on. I'm not sure if I should go down from these highlights, adding a midpoint between them and the shadows, or go even higher.

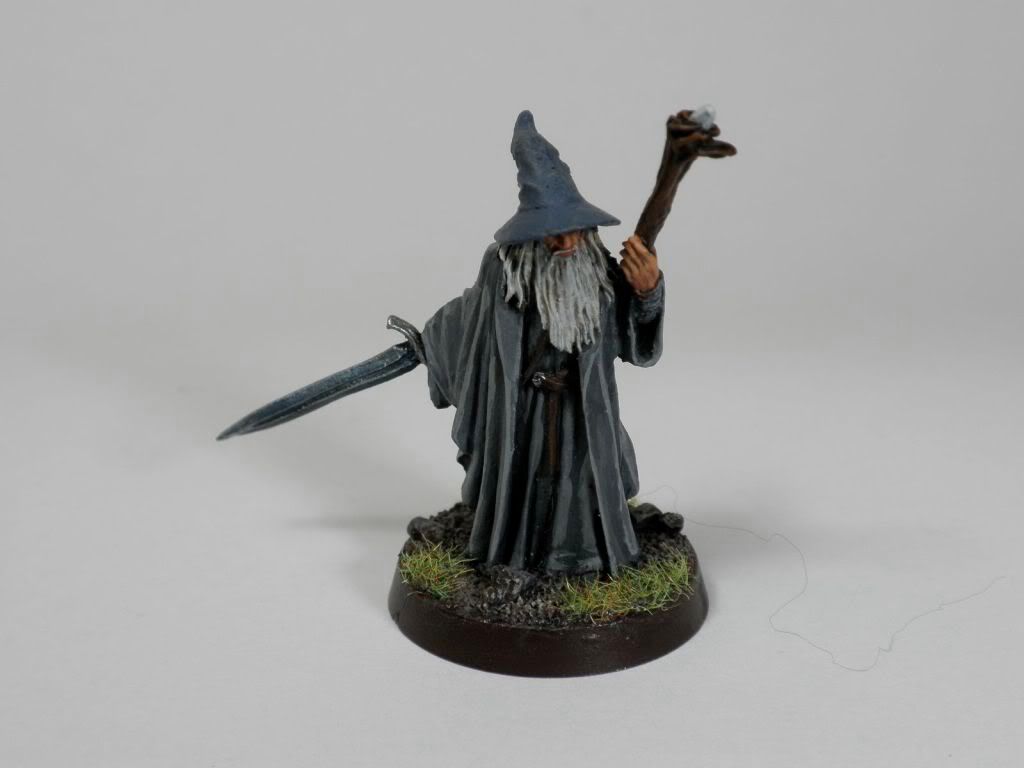
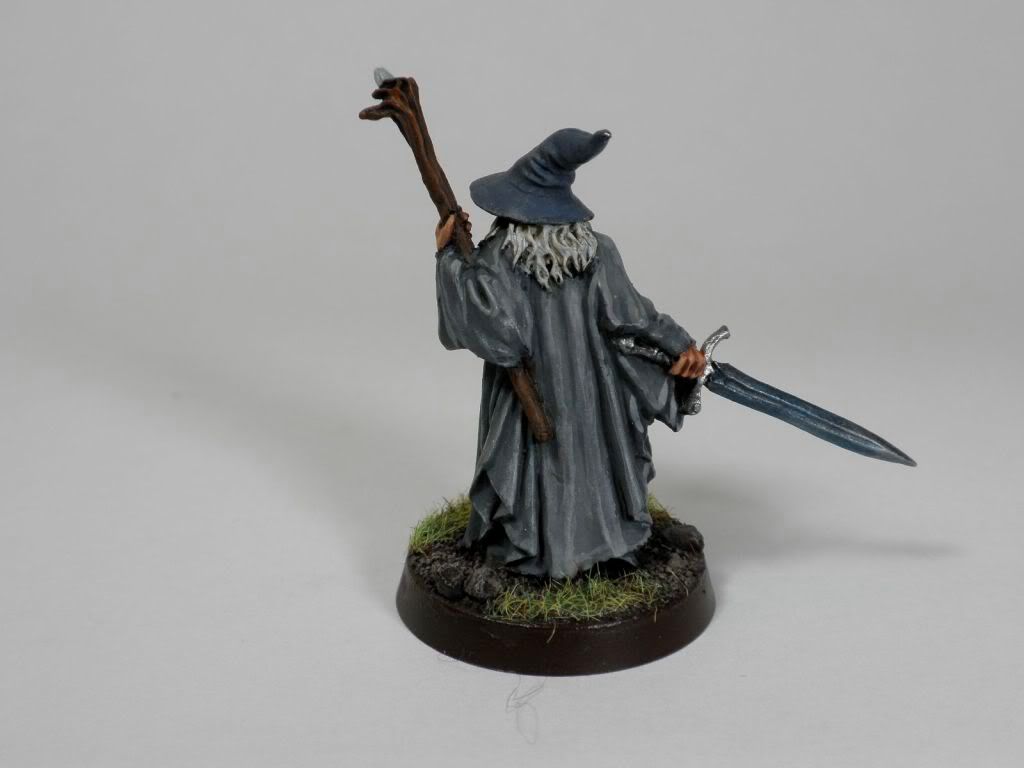
Without question, Gandalf is the best model in the army. I put a lot of time and care into painting him, particularly his hands and folds of the robe. I even highlighted the belt and swordblade.

I do have a little chip on the end of the hat, but I'm a bit afraid of fixing it and causing more damage by not getting the same effect as before.

In contrast to Gandalf, Ecthelion screams "rush job". While I put some time into the cloak, it still comes off too subtle and dark. The rest of him is single, sloppy highlights, drybrushing, unpainted details, and general blah. I've got a lot of work to do here.


So I'm mostly wondering how much I should play up the highlights - I've always gone more subtle with my LOTR models, but I am starting to think I need to really spice it up with brighter highlights. Any thoughts? Tim K, I'd particularly appreciate your insights on this, since you scored this army at the Gathering.

Thanks a ton to everyone who has bothered to read this!

Tuesday, June 30, 2009

Ignornace. It is bliss.

Well, the school year has wrapped up, the Necro is less than a month away, and with the month ending we decided to close our storage account and bring all of my gaming stuff back into the house. In accordance with my earlier plan, I went ahead and inventoried ALL of my uncompleted miniatures so I could set up a priority list of projects and the like.

The horror... the horror...

I decided on a completely rough-stick estimate of 1 hour per model or stand of models, figuring that the drybrush specials will balance the big models and showpieces. I also figured I could reasonably put in about five hours a week with a new baby coming up. Optimistic, I know. So given that, I figured out how many weeks it would take me to work through my stash of models.

10.2 years.

Oh. My. God.

Note that does not include the Minas Tirith models that I need to touch up after my piss-poor painting showing at the Gathering. Oh, or the rest of my Dark Angels company that still needs to be done. My baby will be getting ready to take classes from me in middle school before I'm done!

The scale of this is almost completely overwhelming. I have no idea how to start prioritizing. I need to just cut sling load on a bunch of this stuff, but I don't even know when to begin.

I'm almost depressed. I need to get my brain wrapped around this before I can really proceed. Well, and get cracking on the improved paint jobs for the Necro.

Just don't look at the huge pile of mini boxes...

Sunday, April 19, 2009

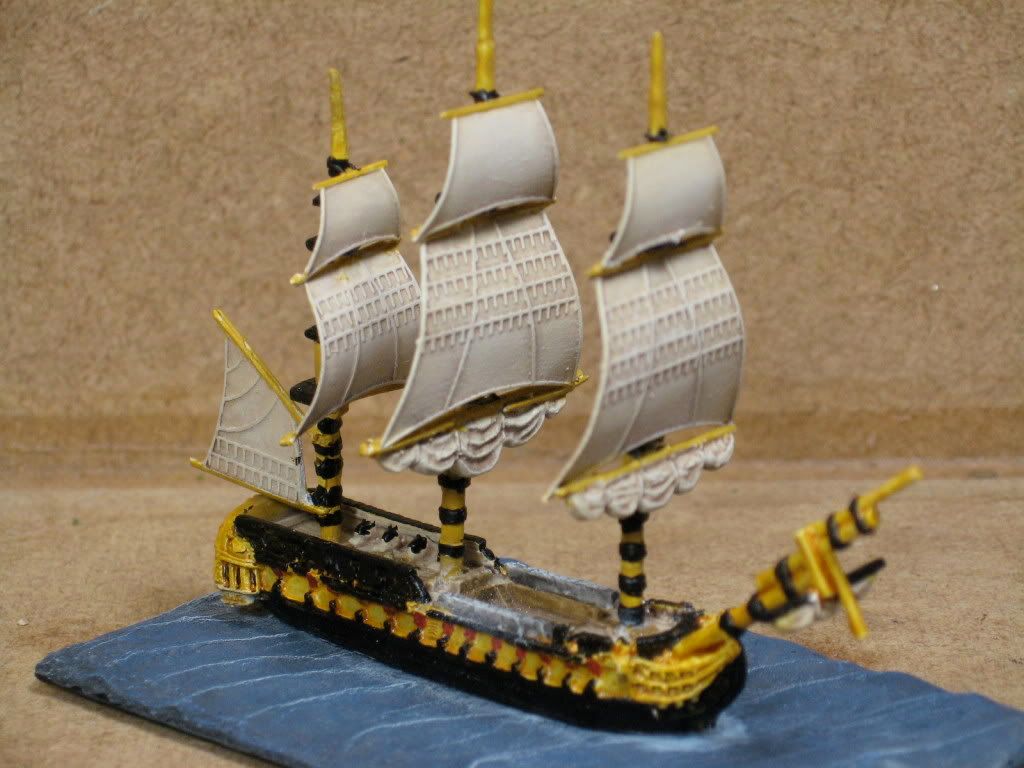
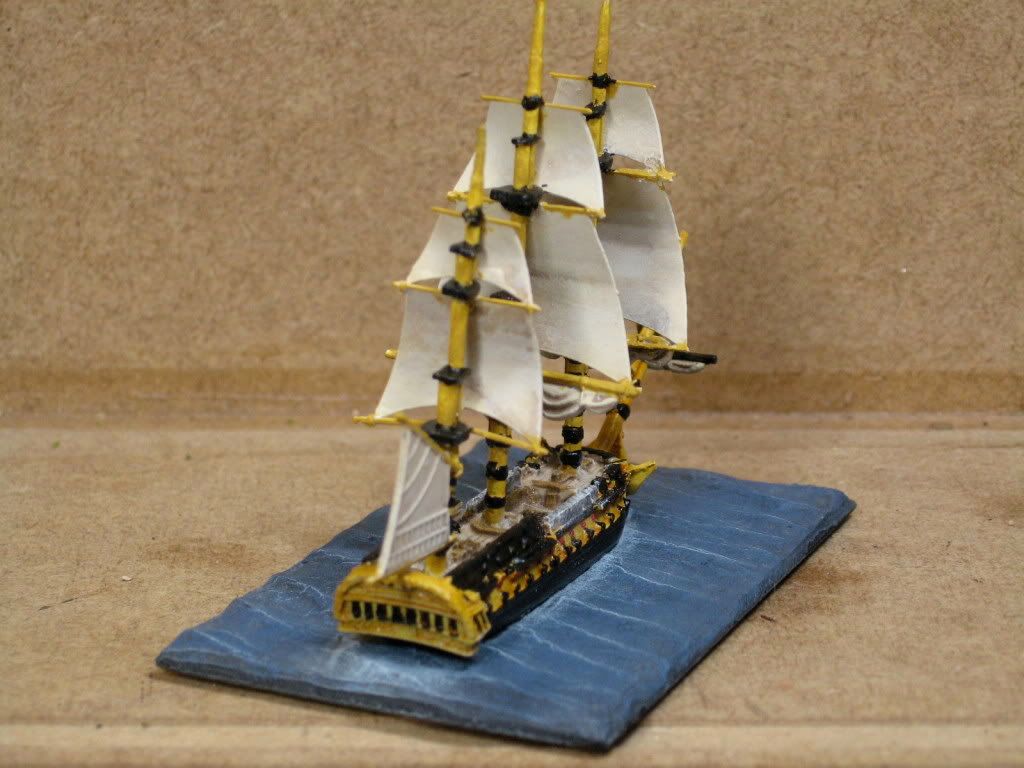
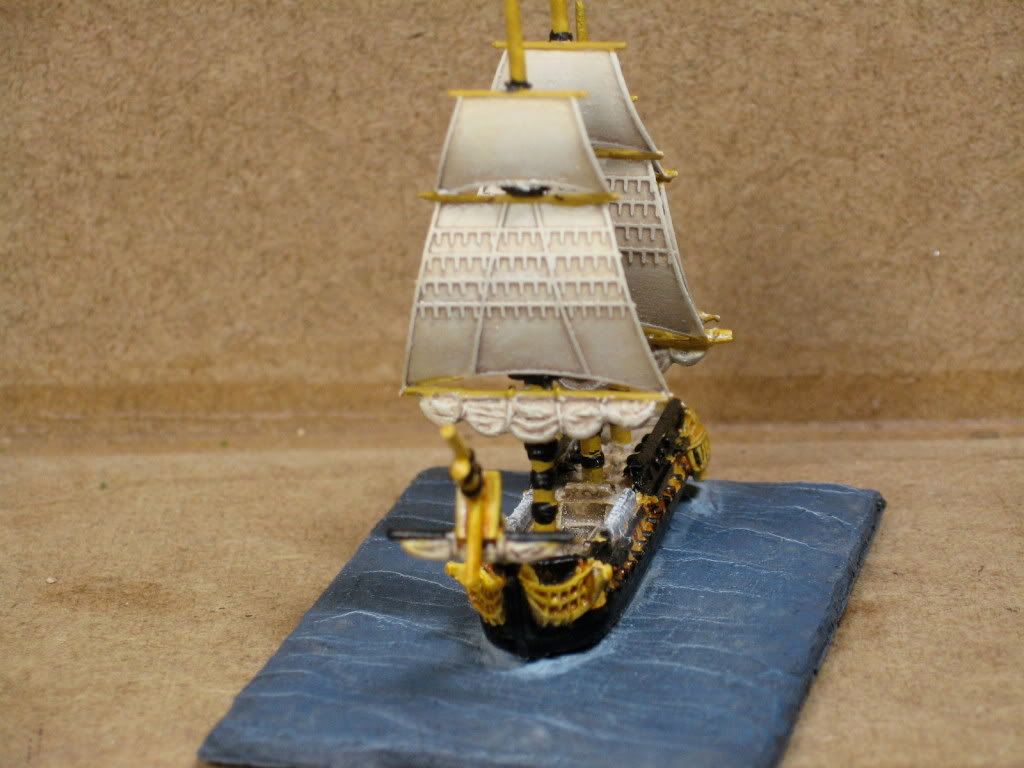
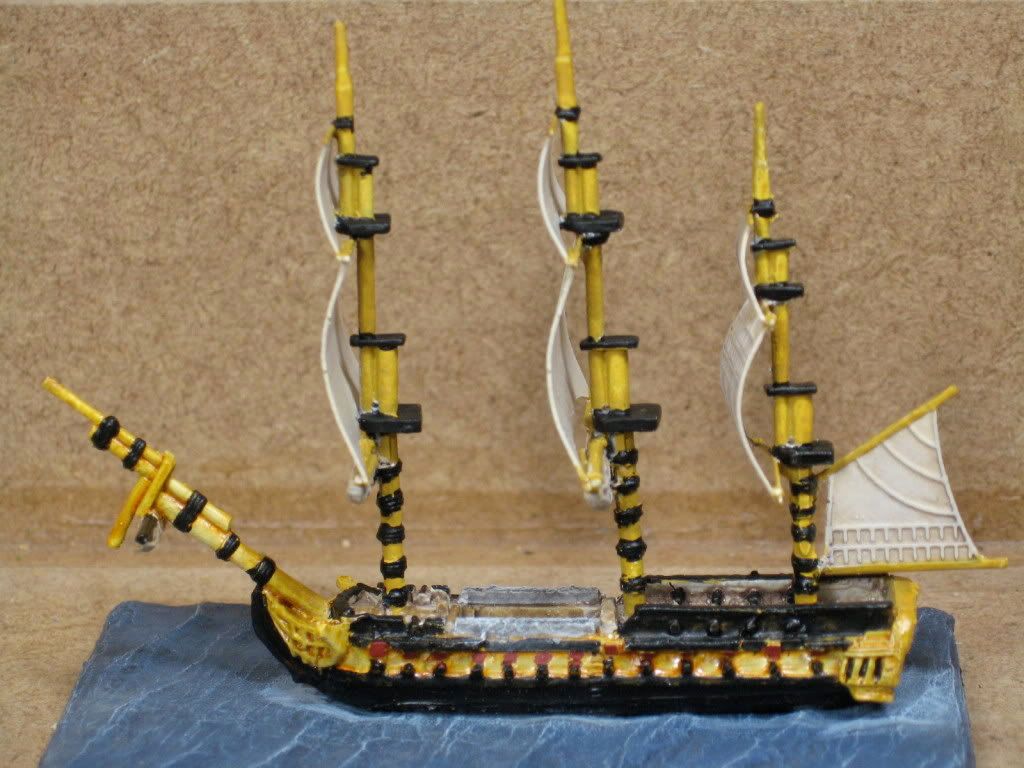
HMS Guerriere done without rigging


Finally finished working on the Guerriere, with the exception of the rigging. I really should have done some of that before I based it, but I got impatient. I'll try to do that once I've primed the other three ships I've constructed.


The most interesting aspect of all of this was the base. I was kind of torn on this one - the directions in the Trafalgar book give a method that produces a very blue ocean, like what I'd associate with the Pacific or the Mediterranean. I wanted an Atlantic color, though, which would be more grey. So I went with a thinned basecoat of Adeptus Battlegrey over a black primer, followed by an overbrush of Fenris Grey, and finally a light drybrush of Space Wolf Grey over the peaks and around the area the hull would go. I may try white instead of the SW Grey next time, but overall I like the effect much better than the rich blue that the rule book uses.


I also finally got the other three ships built and ready to prime. I'm going to do the US ships with a black primer and the other British ship, along with the sails, in white. I'm trying to leave the masts in the British ship, while putting the other masts into a Starbucks' cup sleeve (putting the masts into the corrugation) for priming.

I also learned an important lesson in construction of these ships - build them one at a time, and don't do it when you're distracted. The masts and sails are just too similar to each other - I ended up putting the wrong sails on masts something like four times while building the USS Essex and my British sloop, and when I finally finished I found I had actually SWAPPED MASTS, and trimmed the mast to fit already. Well, crap. Fortunately, they don't look TOO crazy off, since it is going from a ship-sloop rig to a small frigate rig. But from now on I build one ship at a time, no more.

Saturday, March 7, 2009

Sigh - so much for Adepticon

I'm sad. I was lining everything up for Adepticon - I had a partner for the Team Tournament, I had a reservation for the hotel, I knew which flights I could buy, and I was planning my list. The one thing that I thought was a sure thing, though, bit me - I couldn't get the time off of work. That is the week of standardized testing, and it was seen as too important to have me miss proctoring one segment of the test out of about fourteen. Well, crap. So no A-Con for me.

I did manage to get everything set for The Necronomicon, though. My hotel is paid for, I've gotten my frequent flyer mile ticket out there (first class! - ironically the cheapest seats available), and I've registered and paid for the con itself, which as always is the cheapest part. I've even sent in my list, which is the same one I used for the Gathering. It served me pretty well there.

So now I need to improve my paint jobs. Some of the highlights - I'll need to get all of the details painted and then highlighted. I'll improve the level of overall highlighting, particularly on the rangers and Guards of the Fountain Court. After all of that, I'll probably do some extra details, like edging on the Guards cloaks and battle damage on the shields.

So now the clock is reset, with the countdown ending on July 24th. I'll get myself a paint plan going in a few weeks, after I've finished my grading.

Thursday, February 19, 2009

Main parts of Fountain Court done

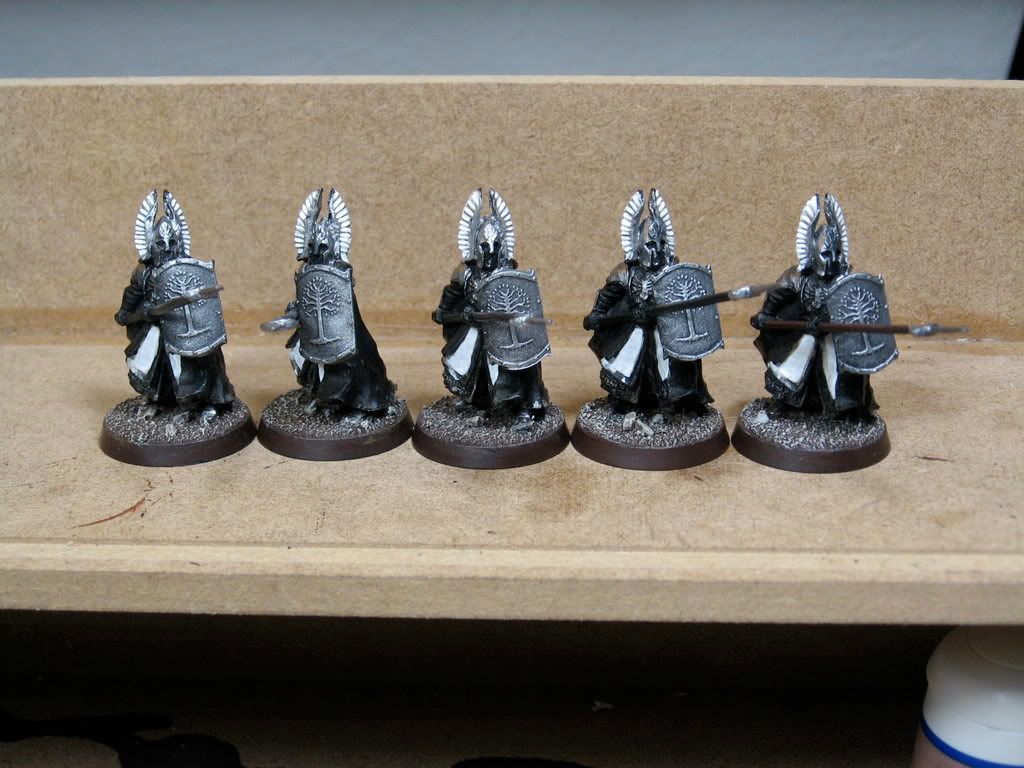
I wasn't able to get pics taken yet, but I've gotten all of the basecoating done for the Guards, and now just need to get detail and highlights. They're looking pretty sharp, though I probably could have done a better job with more time. I'll get Ecthelion and a couple of Dunedain with spears primed this morning to see if I can get them knocked out tonight.

I hate painting white...

OK, I just spent a little over an hour to get the white onto these five models. Figure about 22 minutes a model to paint the feathers and the tabards from black to brown to bone to white.


Ugh, what a pain in the rear. There just isn't a lot of options - a white undercoat wouldn't have worked, and from my experience it is harder to get a really good shadowing on white base coated models. It's great for set pieces, but for speed, I prefer black priming.

Of course, then you still have to deal with white.

Wednesday, February 18, 2009

First Fountain Court done to minimum standard

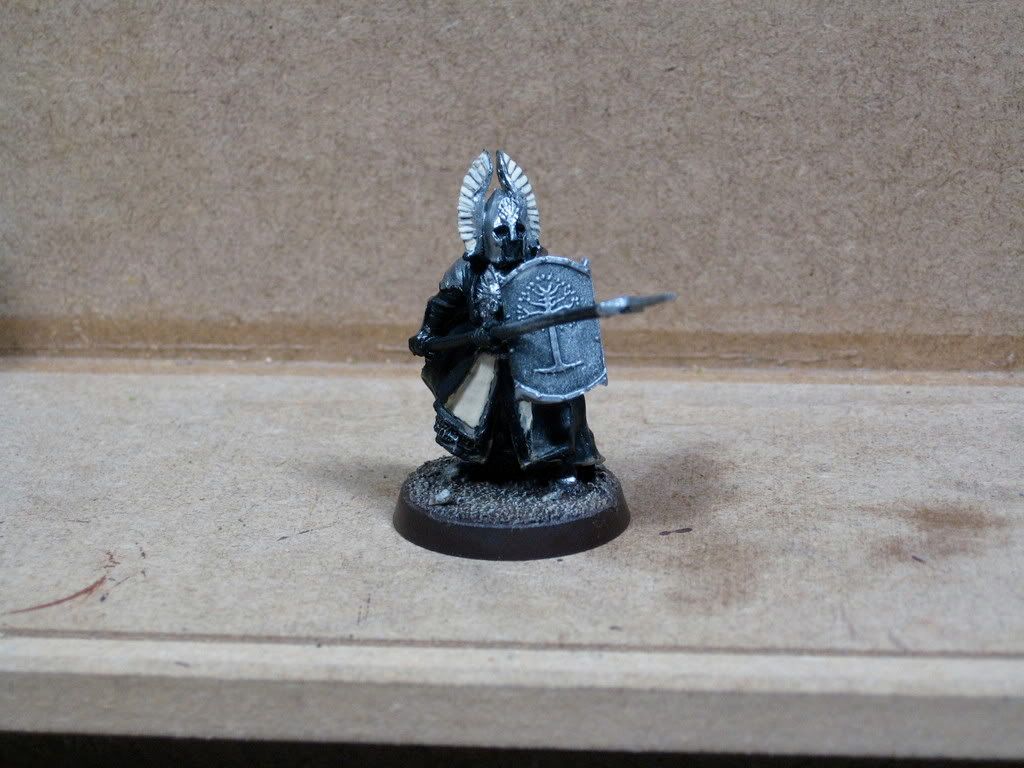
OK, so my test model for the Guards of the Fountain Court is done. I am pretty happy with it, but I'm going to have to determine how to do it more quickly than the hour and a half or so that it took me to do. Assembly lining it should help, but some parts are just going to take a while.

So I started off with a coat of Khemri Brown, a tan Foundation Paint, covering the areas that will be white. Nexxt I put down some Bleached Bone - I had to put a couple coats down on the flatter areas - keeping light colors smooth is a huge pain. I tried to keep the darker Khemri showing in the low areas.


Following that, I put down Skull White, again in some cases having to put down a second, more watery coat of paint to smooth things out. The feathers on the helmet did take a significant amount of time here.


I then put down Dwarf Bronze on areas that would be metallic gold, including on the edges of the shoulder plates. I then put down Shining Gold. The Bronze is a key element to put on first, because without it the Gold looks thin and streaky. I'm going to have to pare this back - the armor edges were a huge pain in the rear to get right, so I'll probably just stick to the helmet and the tabard. I also had to put some Ogryn Flesh wash on the decoration on the helmet then flat highlight with Shining Gold, since the texture wasn't very deep and the paint was thick. Next time I'll just put down the wash over the Bronze. I also put black paint into the areas along the gold to separate it from the white cloth.


Next came putting black on the shield, including taking the time to put some black between the branches on the shield. This does make the shield look nicer, but I'll only do that on all the models if I'm flush on time. Not bloody likely at this point. I also put a black wash over the chest armor, which brought the tree out nicely - it kind of looks like a Spiderman symbol while painting it...


Finally, I highlighted the black cloth with a mix of black and Shadow Grey. This was the hardest decision for me, since I really wanted to black to look black, but in the end I thought tying the highlights into the rest of the force would work. I then painted the skin inside the helmet with Tanned Flesh, painted the eyes white, dotted the pupils with black, and highlighted the flesh with Dwarf Flesh.


At some point, I want to improve the highlights on the cloak, highlight the metallics, and put a design into the gold trim. Oh, I need to paint the spear shaft brown as well, but that's a must do. I'll probably do that later tonight or tomorrow. I think next up will be converting Ecthelion.

I'm way behind...

Well, the great push I planned over the weekend ended up being a flop. I did get the following done:


So I've got all of my basic troops done to a minimal level and my Fountain Court are getting started, but I still need to convert Ecthelion, and I'd really like to get three more rangers converted with spears. As much as I hate to admit it, I'm contemplating calling in sick Friday... OK, I almost certainly won't do that, but I can see forgoing my sacred sleep to get some more done.

Wednesday, January 28, 2009

Building for Must Do done

OK, I've gotten the last couple of Warriors built, plus they and the Guards of the Fountain Court are based. So at this point I've got everything on my "Must Do" list constructed, cleaned, and sanded. Next up is priming and basing. After that, I'll probably just bring the Warriors up to the standard the other Warriors are currently at, and then shade them all together. I also need to get cracking on making the rangers I have now appropriate with shading and highlighting. The last step in this list will be to paint up the Guards to fully done.

I'm hoping I can get all of that done by the end of the weekend. Don't know, though. I've also got the plastic rangers and Ecthelion to do after this, so I need to get cracking.

Tuesday, January 27, 2009

New priorities

Well, while watching some more Firefly on DVD, I finished these fellows.


In the Army, there was a saying: "No plan survives contact with the enemy." As it is here. I've got an opportunity when I finally got these models, and now that they are converted and built, there really isn't any reason to not move them ahead of finishing the Citadel Guard. So these six boys are moving onto my "Must Do" list, and I'll be getting them based, primed, and painted before the Citadel Guard.

Monday, January 26, 2009

Cutting in line

One of the things that my wife likes to do with me is to snuggle together and watch DVDs in the evening. It's nice together time, and it's fun to watch TV on our time. However, this does distract me from working on the important stuff, like models. I'm kidding, of course. Particularly since my wife just saw that.

I've noticed that it's pretty much impossible for me to paint and watch TV at the same time. The light sucks, there isn't a good way to brace my hands, and I just am not focused. However, I have found that I can build stuff and clean mold lines and the like while watching TV. Well, I got a wild hair up my butt this evening and these guys decided to cut in the priority line:


The biggest pain in the rear was freeing the shields from their former hosts. I managed to ruin one shield in the process as well as stab myself in the thumb with an exacto knife. So if you see red on one of the models, yes, that is my blood. I give to this hobby.

Sunday, January 25, 2009

Status report on the Errand

OK, so it's time for me to evaluate where I am compared to where I need to be. The Gathering is now less than four weeks away, and I still have work to do. Not surprising. If anything, it's surprising just how far I've actually gotten towards my goal. So here it is:

MUST DO

This level includes construction, basing, and painting through at least three levels of color on the models (shade, mid, highlight).

Gandalf
6 Rangers
8 Rangers with Spears
6 Citadel Guard (2 bare, all need highlighting)
2 Warriors with shield and spear
22 Warriors with shield (incl captain) (4 bare, half need highlighting)

LIKE TO DO

This level includes conversions and construction, basing, and painting with at least four levels of color, preferably five.

Ecthelion conversion
5 Guards of the Fountain Court with shields
2 Rangers with spears
6 plastic Rangers
2 plastic Rangers with spears conversion
1 Warrior with shield (probably just include him in earlier batch)
Touch up models to a higher standard of highlighting and shading

MIGHT DO

This level includes construction and painting to at least three levels of color, with the character models painted to display quality (entries into Red Dragon).

Mounted Ecthelion conversion
Rivendell Gandalf
Warriors with spear converted to using swords
6 Knights of Minas Tirith
New display board

As things stand, I can definitely see getting through the plastic rangers, with touch-ups being done as much as possible. I may jump the conversion of the mounted Ecthelion forward in order to get something interesting into the painting competition, but no further than ahead of improving highlighting on the entire army.

However, I do have other things going on in my life which could distract me, particularly grading papers, which I am woefully behind on. On the other hand, I've played through Mass Effect twice, so that doesn't have the time-sapping draw it once had. We'll see how things go next week.

Sunday, January 18, 2009

Sense of urgency restored

Well, I found out on Thursday evening that there would be another tournament this weekend, but I put off doing almost anything about it until this morning. That's right, this morning, specifically around 5:30 am. At that time, my army looked like this:


To back up a bit, the tournament was being held at Games Workshop in Alamo, CA. Well, this is a good venue, but there are always limitations to playing in a GW store, which I am personally familiar with from having managed one and running many tournaments there. In particular, store hours is a big issue. In this case, the store was open from 12 noon to 6 pm. Also odd was the points level: 650. Upon prompting the manager, it turns out the rounds would be 1:45 long. Ooooo-kaaaaay. Grand Tournaments run 2:30 for 600 points, why would this be shorter rounds and more points? I made a quick decision that I wasn't going to paint any more models than I had planned on for the 500 point tournament, so I needed to crap some painted models. I decided on the following list:

Gandalf the Grey

Damrod

17 Warriors of Minas Tirith with shields
4 Warriors of Minas Tirith with shields and spears
4 Citadel Guard with spears
4 Rangers of Gondor
7 Rangers of Gondor with spears

Eomer with horse and shield

5 Riders of Rohan (1 with bow, 1 with throwing weapon)

This made things easier because all of my Rohan are painted. Plus I didn't want to bulk out the army heavily so I could play it faster. And I already had my hands full painting the above models.

So back to 5:30 am. I knew my ride would be arriving around 10:30, so I had a total of 5 hours to crank out as much of this army as humanly possible. Oh, and get dressed and showered. Preferably not in that order. I figured I could get a passably painted army done in that time. Time to work on the Zen of the Tank Brush!

First step was an overbrush of Boltgun Metal on all of the armor. I love Boltgun Metal. It comes out nice and dark in a drybrush, but it's bright enough when block painted to look like steel. Twenty minutes later, my warriors looked like this:


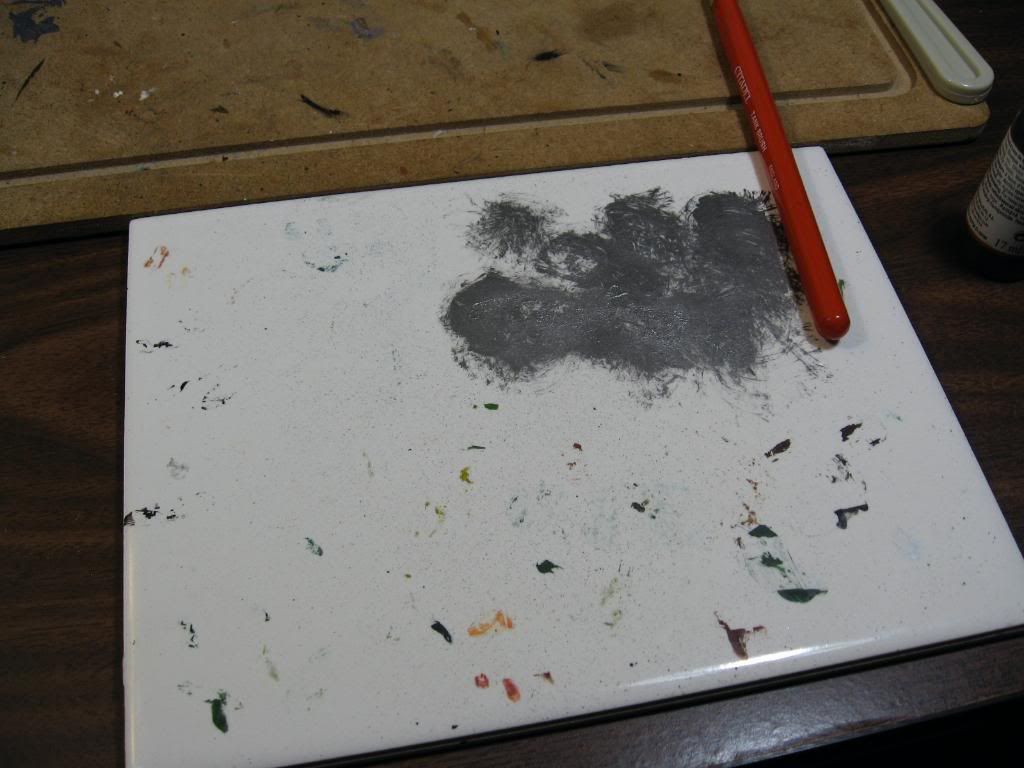
This was a nice overbrush, achieved by putting a small amount on the tank brush then dragging it in circles on the palette until it could be seen through. By the way, I have found that a tile palette is a very, very useful tool. For a while I used a plastic one, but it was hard to clean and of limited use. But here's a look at what my palette looked like after loads of overbrushing.


One shortcut that I also decided upon was to just drybrush the shields metallic instead of going white. I can touch them up later if I really want to. Note the difference between the drybrushed shield and emblem and the overbrushed armor:


Next, I overbrushed the armor of the Citadel Guard with a smaller brush. This took me about five minutes.


By the way, I did take pictures with a couple different light arrangements. You can see all the pictures if you really want to at my Photobucket account.

A couple minutes later, I had the Guards armor washed with Badab Black, and by 6:40 I had all of my models washed black, including some on the rangers for emphasis of the textures.


Next, I did the overbrush of the two extra rangers, and tried to do a tank brush overbrush on them without using the tankbrush. This didn't work so well. Instead it left big swaths of Bestial Brown over the model. Hopefully I can shade that out later. After that, I block painted Boltgun Metal onto everyone's weapons. Here was the status as of around 7:20:


At this point, I took a break to shower, get breakfast, and type up my list. This also let the washes thoroughly dry.

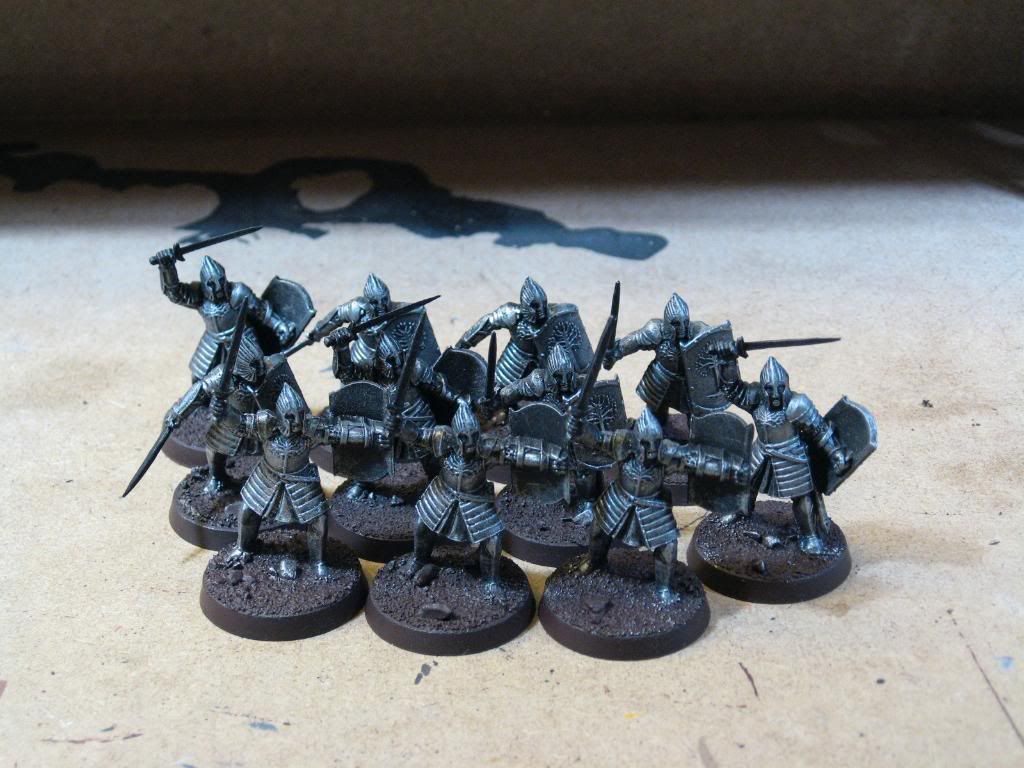
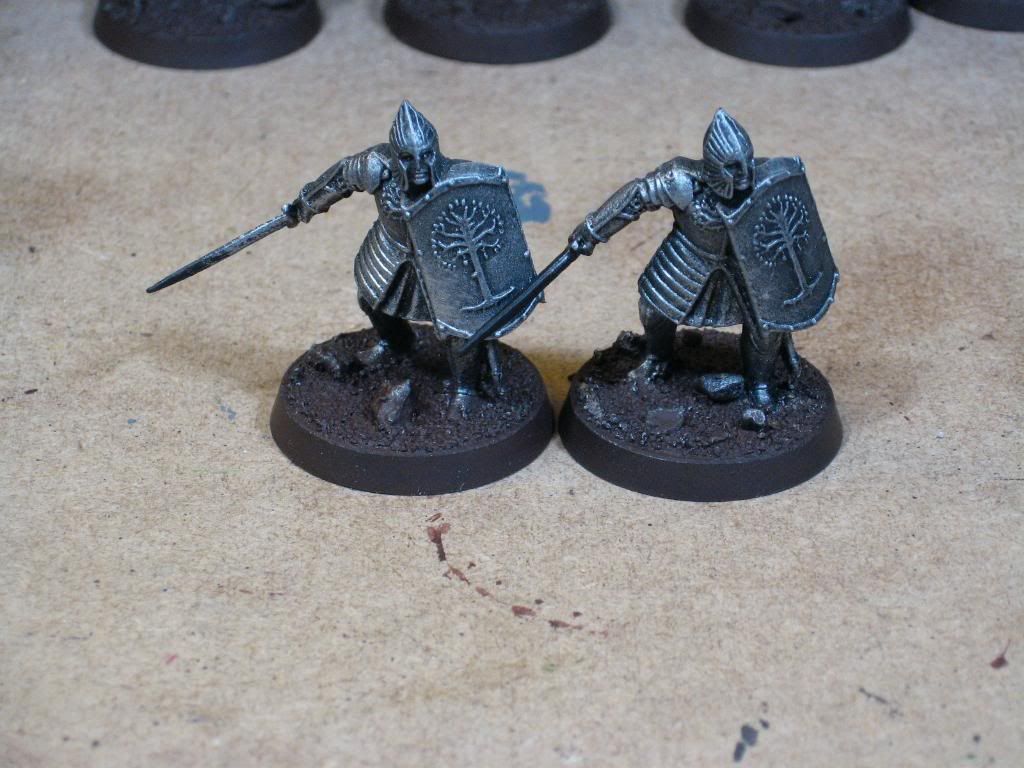
I was back at the grind around 8:00. I did a heavy drybrush of Chainmail over the entire warriors armor, and this came out very nicely. Unlike the overbrushes, I removed some of the paint via a paper towel this time. I liked it so much I just decided to do the exact same thing with the Citadel Guard. Here is a shot of two of them, the left after the Chainmail drybrush and the right with washed Boltgun overbrush.


I also gave the shields of all the warriors a nice drybrush of the Chainmail to highlight their trees. Here was my army around 8:30:


I next threw a light drybrush of Mithril Silver onto the symbol detail, particularly the trees and gull wings on the helmets. I also did some onto the upper shoulders and raised arms. This is as of 8:45:


At this point, the messiest parts are done. In order to really make these guys look done, I needed to get their bases looking good. A couple of things about basing: First, you need to choose a base that complements the model but doesn't distract. With a pretty light model, I prefer a darker base. With a dark model, I'll go for a lighter base. In this case, I'm doing Scorched Brown bascoat, Graveyard Earth midtone, and Bleached Bone highlight. This step was the biggest pain. I'd already done the basecoats, but I have a really hard time doing good mids and highlights. The best ones are controlled overbrushes which leaves plenty of paint up higher and the darker color beneath showing. I always either seem to smear tons of paint over the bae or dust the base so lightly it's almost invisible. I finally managed to get something decent around 9:15:


Next step, skin. I'm starting to feel the crunch now, and I'm also sitting around in my bathrobe still. I just decide to get some Tallarn Flesh on now, and if I can shade it later then great. I whip out one of my kolinsky sable brushes and apply the flesh to my models. Around 9:30 I had this:


Now I took a brief break to pack up everything I needed (other than the models I was working on) and get some clothes on.

One note about my brushes. You may have noticed from my painting station that I have two sets of brushes in it. On the right on standard GW brushes, and on the left are some brown handled brushes. These are Vallejo brand kolinsky sable brushes. A couple of years ago I wouldn't really have been good enough to use these guys. They are incredibly precise – in fact sometimes it's hard to get everything you want covered if you're not very careful about it. For this reason I use my GW brushes when I want good general coverage, since they tend to slide down into crevices and flow around the model, while I use the kolinsky brushes for all of my detail work.

I sit back down around 9:45 and get to work on the cloth of the warriors. About ten minutes later, I had:


I decided against shadowing or washing – I just didn't have enough time to do a good job. Much more important was covering appropriate areas with black paint, such as the Citadel Guards' cloaks and the warriors shields. This took some time – I used the GW Large Brush for the cloaks (coverage), and the Vallejo #1 brush for the shields (control). With minutes until 10:30, I grabbed the Iyanden Yellow from my paint rack and put it onto the trims of the Citadel Guards. At almost 10:30 exactly, I had this:


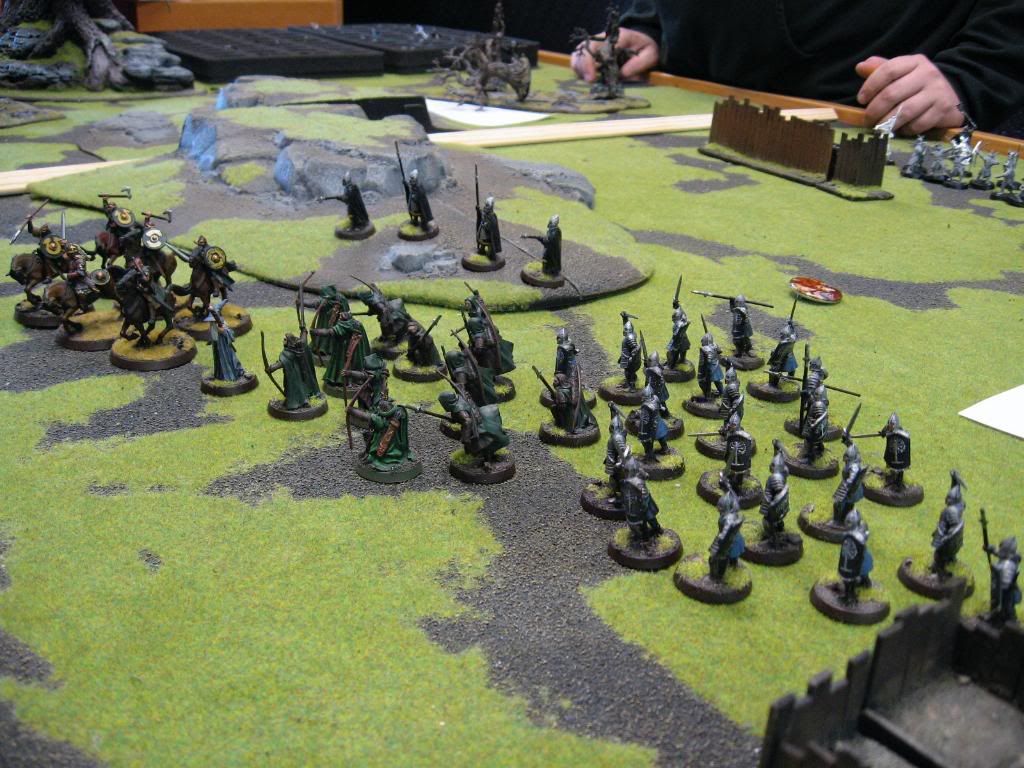
I packed up and went to the tournament. I brought along some washes and my static grass in order to get some more work done with the models. Once we got there, I did manage to get static grass onto all of the models, and here they are, along with their Rohan buddies, on the first table:


Whew! From black models to gaming quality in 5 hours. I was quite pleased with myself. Over the next few days, I'll improve them, adding shading and highlights, plus making the details better. I'll write a report on the tournament itself in a little while.