

This is it. Tomorrow is the big event I've been getting ready for, and naturally I still have painting to do. I did forget to bring a larger drybrush, so I bought one from the War Store in the vendors' hall. I'm ready to roll!
I did get in a game as a warm up, against a fellow named Jim and his French Tank Company. I now see why French Tank Companies are such a pain in the ass - most of my anti-tank is AT6, and almost all of his tanks had either 3 or 4 armor, and those that didn't had 6 armor! Mind you, my Bunkerflaks were FEARSOME, so much so that he hid his Char-Bs behind hills rather than face them. But the rest of the match was a chess match of pre-positioning, since the only thing that could move and still do any kind of decent shooting were my own tanks with their mere 3 shots for the whole platoon (when moving) of AT6 junk. It was a great game, though, and a much needed warm-up.
So that's enough jabbering - tomorrow we face the foe, but tonight we PAINT!
Thursday, July 7, 2011
Tuesday, July 5, 2011
On my way

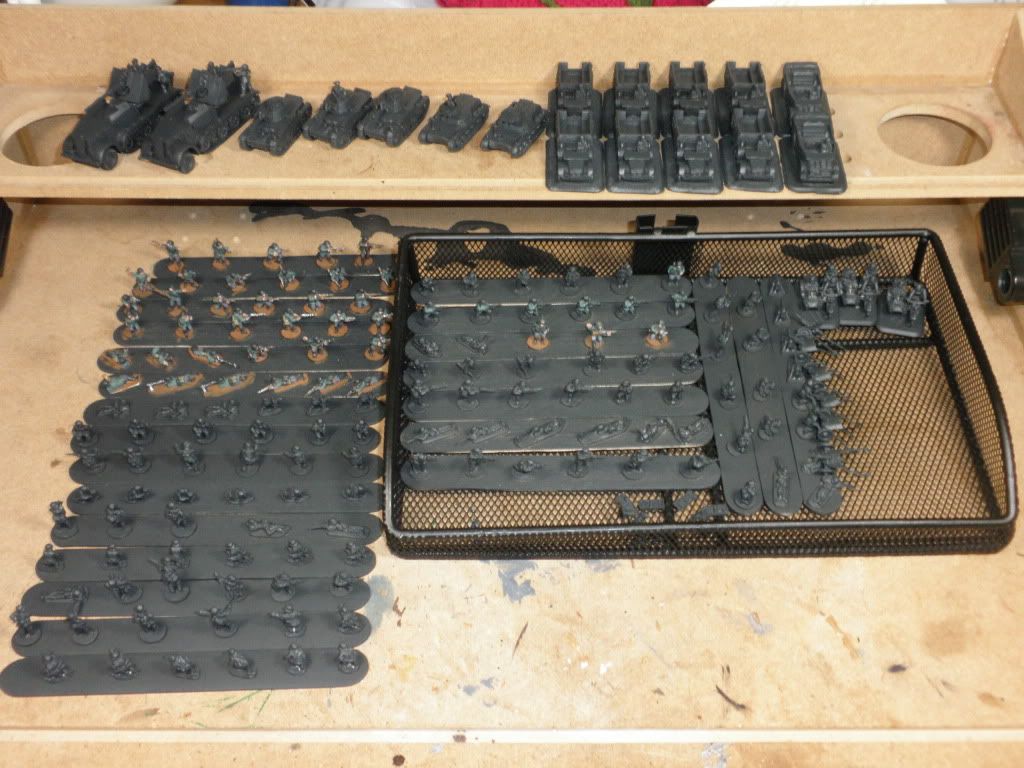
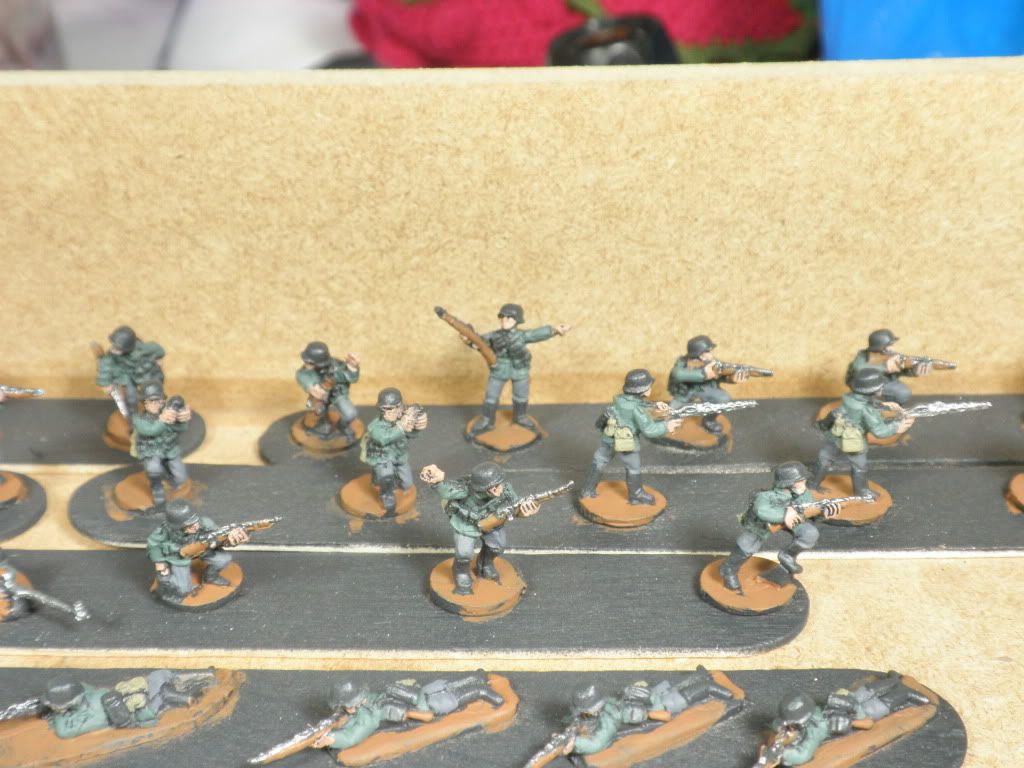
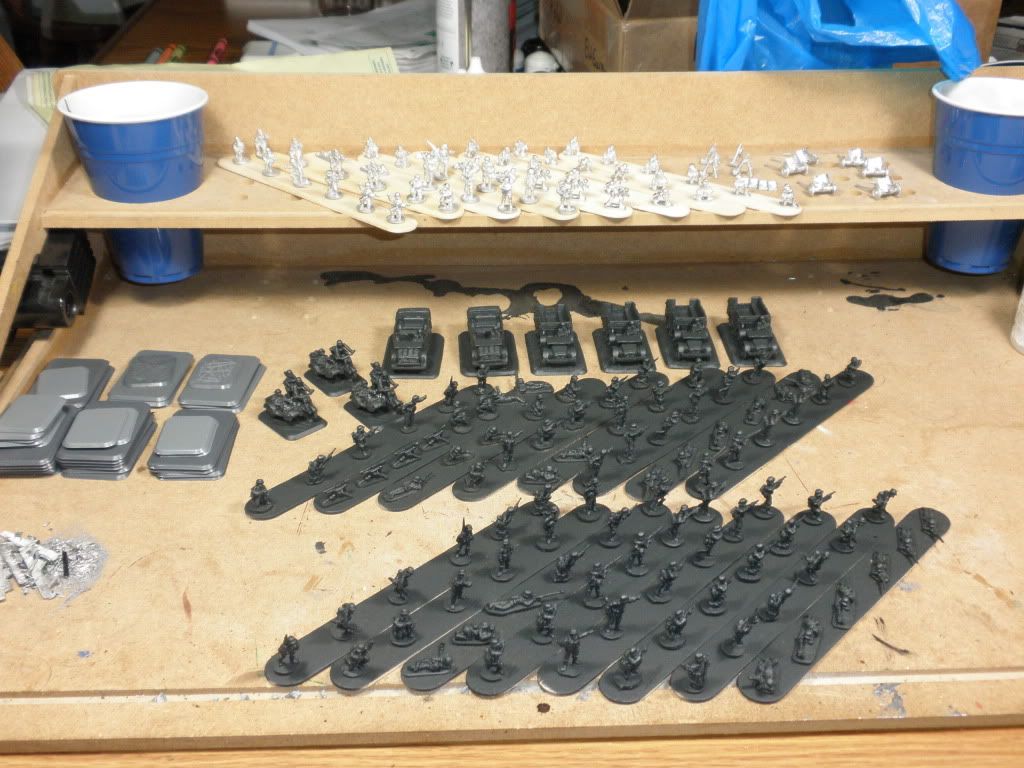
Here we are! There are stil some details left to do, and the transports and Buflas aren't completed, but the army is otherwise done. To be fair, the static grass isn't on in these pictures, but it is now. I must thank my wonderful wife, Laura, who was an ENORMOUS help, basing half the army and gluing on all the static grass. This way I was able to still attend family events during the holiday AND be ready to travel this morning. She is so wonderful! I'll miss her dearly while I'm gone.
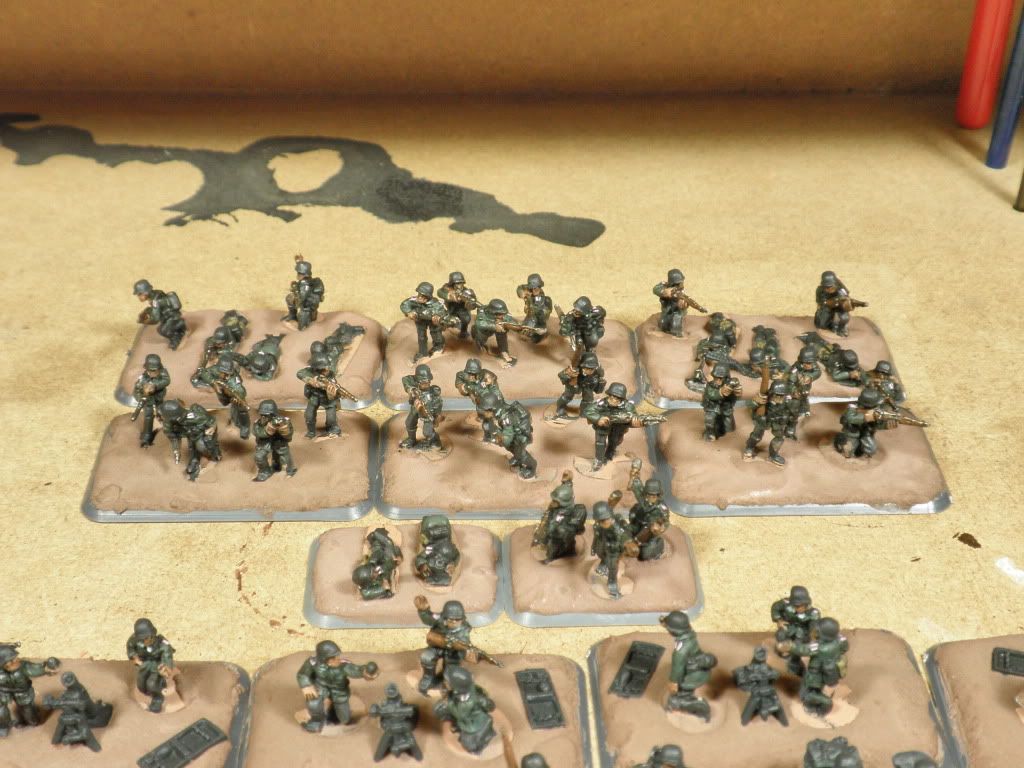
I got the shoulder tabs and collar tabs done, and while often just a blot of paint, the effect is great. I'm going to work a little more on the NCOs rank insignia, and MAY try to get the collar piping done on them, but the collars are often slightly undefined or just plain hard to reach.
The basing material worked pretty well, though it isn't as durable as I'd like. I had one model fall out of the basing material, and it remains a little crumbly. I'm not sure if this is just a fact of life with concrete patch or if it is a problem of adding the paint to the mixture. We cut wedges into most of the bases to give the patch something more to grip onto, so hopefully that helps avoid any problems with models falling out. I did bring super glue just in case.
As always, I still have some work to do. It wouldn't be a tournament if I wasn't painting up until the starting gun! Next steps, in priority order:
- Transports and Buflas to basic level
- Detailing on vehicles, including shoulder and collar tabs for the drivers
- Highlighting helmets and tunics
- Enlisted rank insignia
Sunday, July 3, 2011
Crunch day 2.0

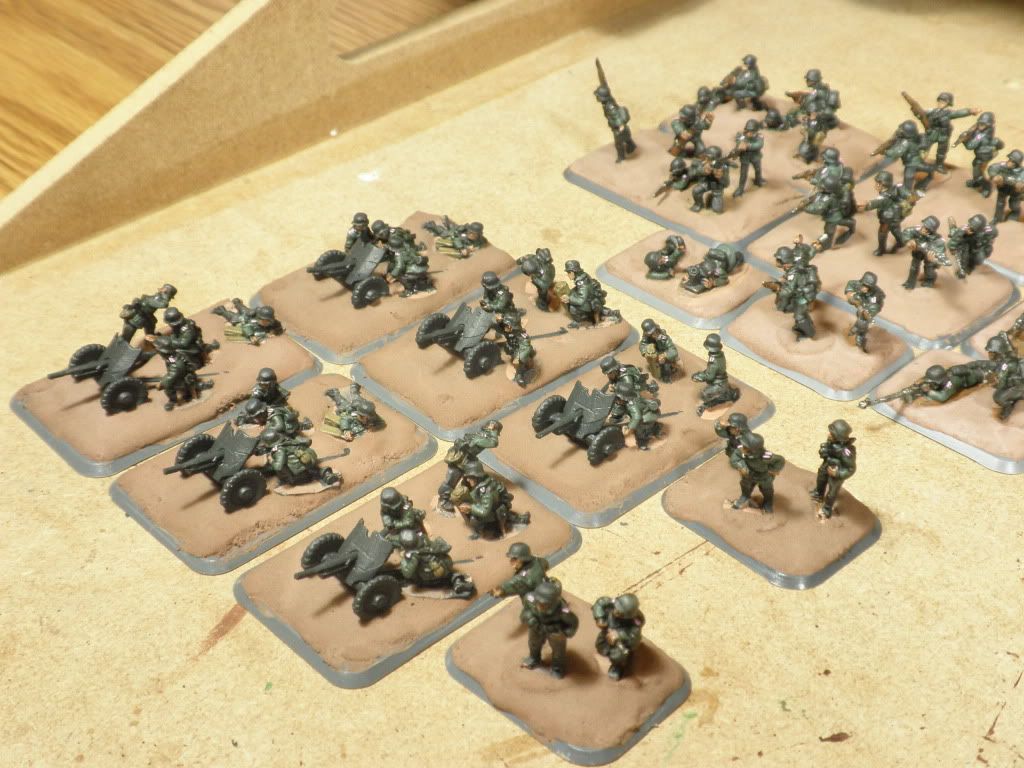
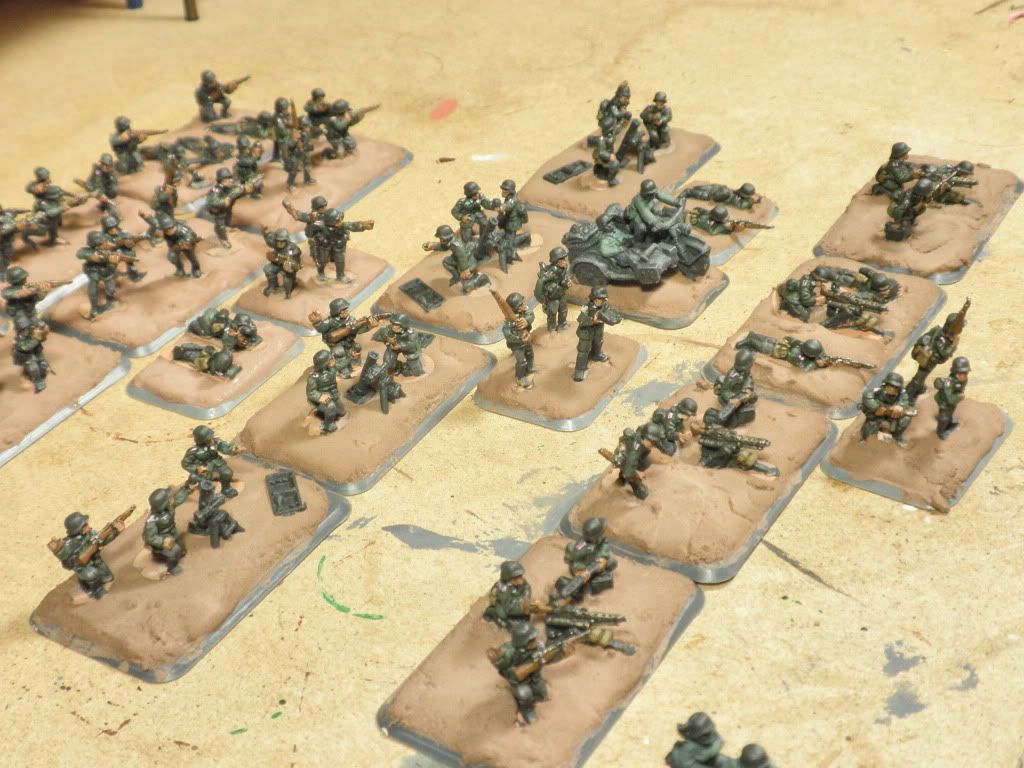
Here we go - all infantry done to a basic standard, all vehicles drybrushed to a basic standard, vehicle crew still need work, guns need some drybrushing, and everything but one platoon needs to be based.
Today turns out to be more open than originally thought (I went to the 8 am mass instead of the longer 10 am), so I'm setting a deadline of 5 pm for basing. Basing will be easier than I originally thought, since the complete lack of texture means I really only need the concrete patch to be even with the bases of the infantry, though I'd like them to be painted a color close to the dried basing material. In the mean time I'll get as much detail done on the infantry as possible. Once that is done and they are based, I'll finish the vehicles.
Saturday, July 2, 2011
Crunch day
Today will make or break me. I've got obligations all day long, but one I basically just have to be available at a place, so I can paint while I'm there. This does mean I have to leave my full painting station, but if I can carry a little with me I can get stuff done.
So my plan is to get my infantry as complete as possible. If I can get detailing done, great. I am currently with all of my non-based infantry (all but the one platoon I already had completed) at the tunics and pants base painted. Since tomorrow I'll have more time, but I need my bases to dry for about 24 hours, I'm going to see if I can base my infantry tomorrow morning, then put static grass on them on the 4th. While the base material is drying tomorrow, I'll finish my vehicles.
My goals in order:
- Metal and wood on the guns
- All skin
- Canteens and bread bags
- Wash (this is the trickiest - I'm not sure what I'll do while waiting for this to dry)
- Webbing and suspenders painted black (where I had to paint over it), plus cleaning up boots
- Collars and tabs painted green
- Collar and tab details (rank insignia, Waffenfarbe, collar stripes)
- Highlight tunics
- Highlight helmets
- Highlight skin
- Helmet decals (very low chance of getting here, and lowest historical priority)
I'll be ecstatic if I get through the collar details, and most of the rest can be handled once they're on their bases and I'm in Pennsylvania.
Friday, July 1, 2011
Basing
I tried my basing experiment tonight, and it went pretty well, though it certainly wasn't the silver bullet I was looking for. I still think it will save me a lot of time in the long run.
I had heard that concrete patch was some pretty good stuff, so I tried that out. I used the unmixed, dry stuff, since I wanted to add house paint I had left over from some terrain I had been working on. I used the recommended mix of 4 parts powder to 1 part liquid, in this case half water and half brown paint. This mixed with the grey patch and created a very nice, smooth slurry in a medium brown color.
I put the concrete patch on the plastic bases and then placed the figures into the patch. I used my sculpting tool to slightly cover the bases from the patch on the base, or if there wasn't enough I got more from the bucket. I usually put too much on, which meant I was cleaning it up with my fingers as it went over the edges of the base.
In the end it took me about 40 minutes to base 9 stands, which wasn't bad, particularly if you consider I won't need to paint these and I didn't have to glue them all down first. There is very little texture - I really prefer the Vallejo pumice putty for that, but it dried pretty quickly and I'll be covering the bases with grass anyway. So all in all, not bad, and I'll see what paint I have that matches the base color and start painting the bases of the models in that color.
Thursday, June 30, 2011
Tank platoon almost done

All right! I've got my Czech Tank Platoon done with the exception of markings on the three Panzer 38(t)s. I'm pretty happy with how they turned out - I needed to use a light Bleached Bone highlight on the brown areas of the camo for the detail to really come through the wash, but I think this will do quite nicely! Next up - the trucks and motor cycles.
Wednesday, June 29, 2011
Test tank done
Well, I decided to get one tank done to the level I'd like them all to be at, and here it is:
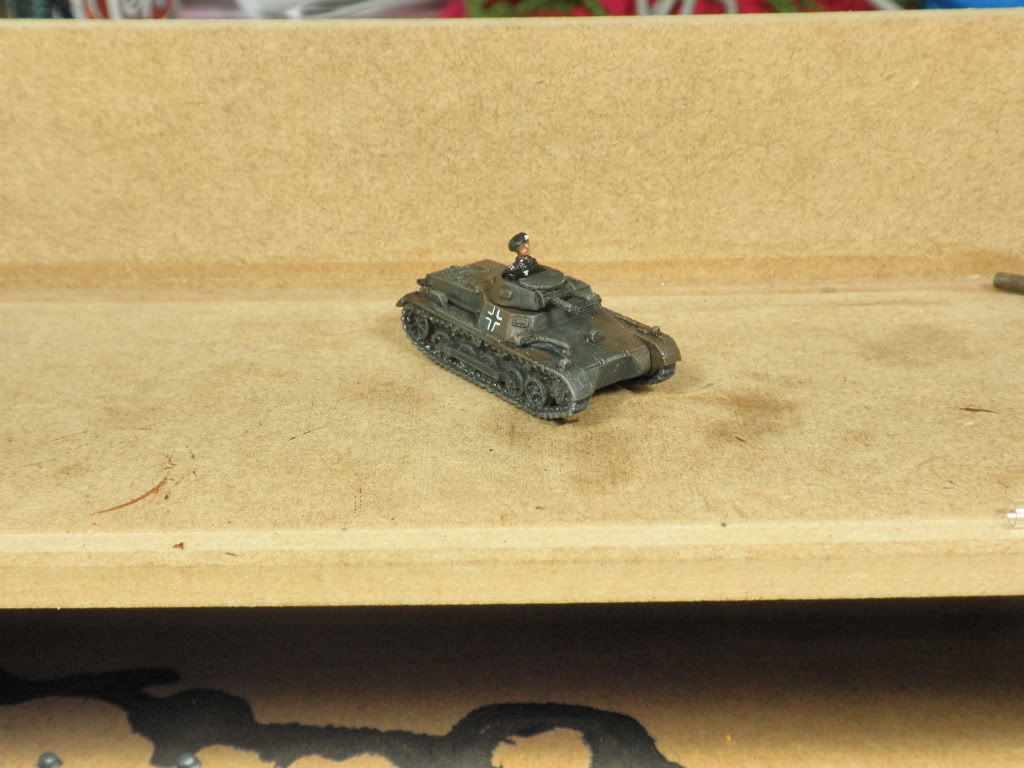
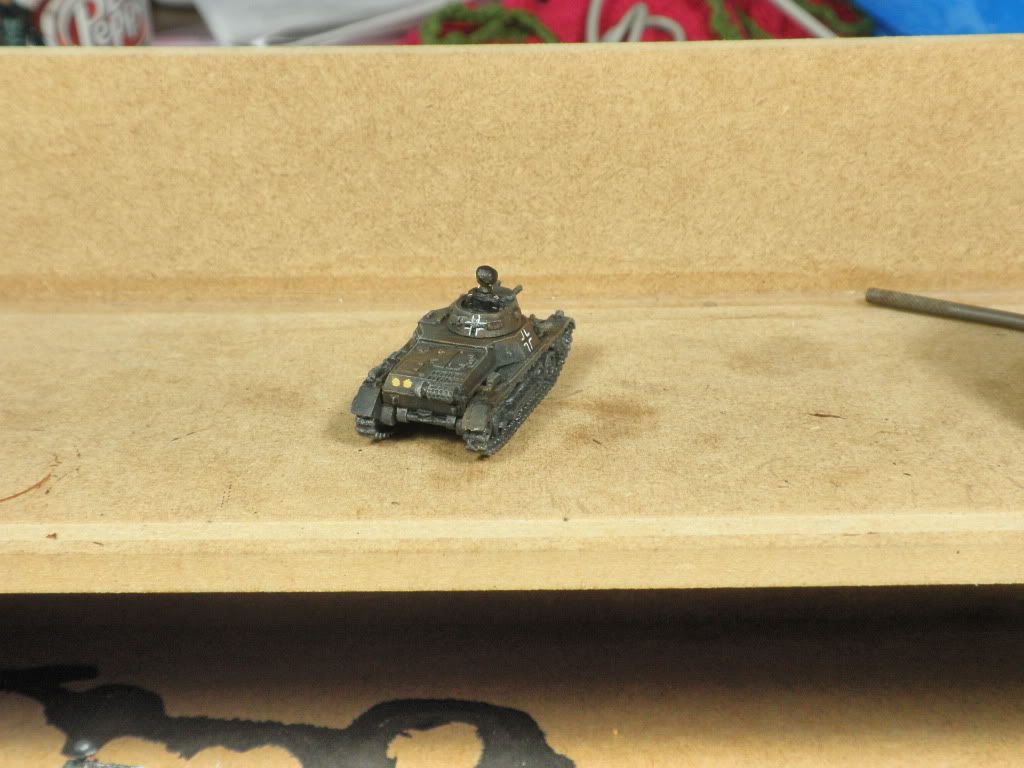
I've gotten the German cross painted on two sides (the door on the other side isn't quite right and has a big latch in the middle - I figured I wouldn't bother), the symbol of the 2nd Panzer Division on the back, and the commander detailed including highlighted face, insignia, and pink Waffenfarbe. All in all, I'm pretty happy. I'll get more weathering onto them if I have more time.
I've gotten the German cross painted on two sides (the door on the other side isn't quite right and has a big latch in the middle - I figured I wouldn't bother), the symbol of the 2nd Panzer Division on the back, and the commander detailed including highlighted face, insignia, and pink Waffenfarbe. All in all, I'm pretty happy. I'll get more weathering onto them if I have more time.
Experimenting with Camouflage
I decided to try to get some work on the tanks done since it really will be the easiest to get looking good. Last night I drybrushed the grey up to a final highlight of white, and this morning tried some camouflage on the Panzer Is. Here are the results:
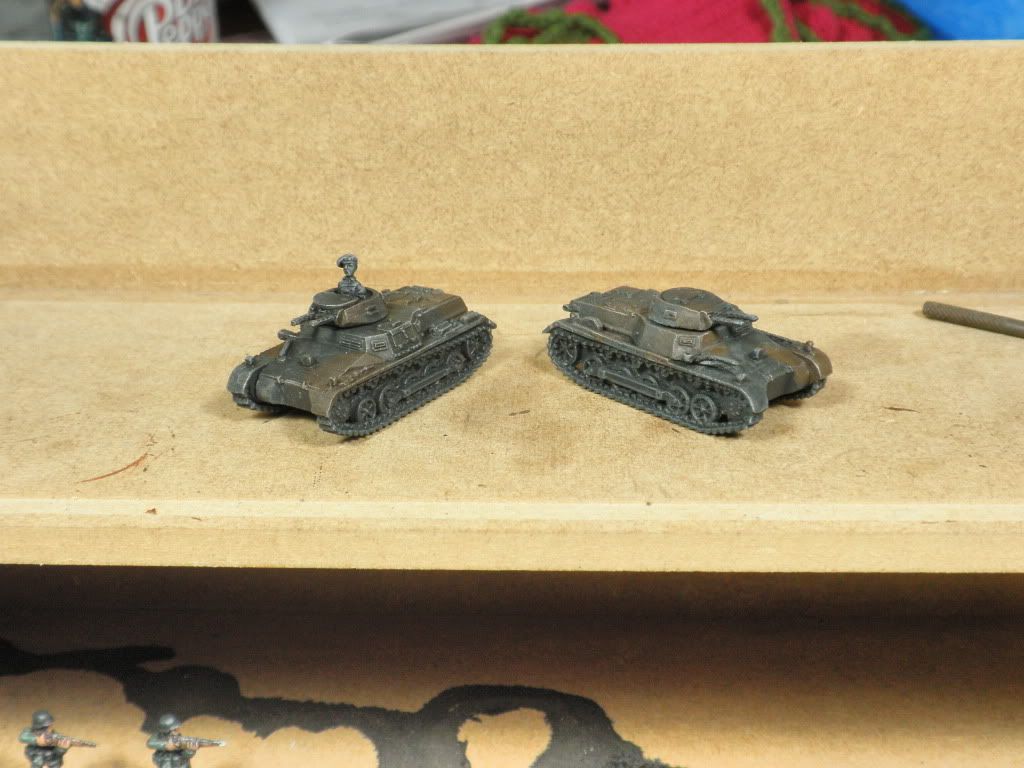
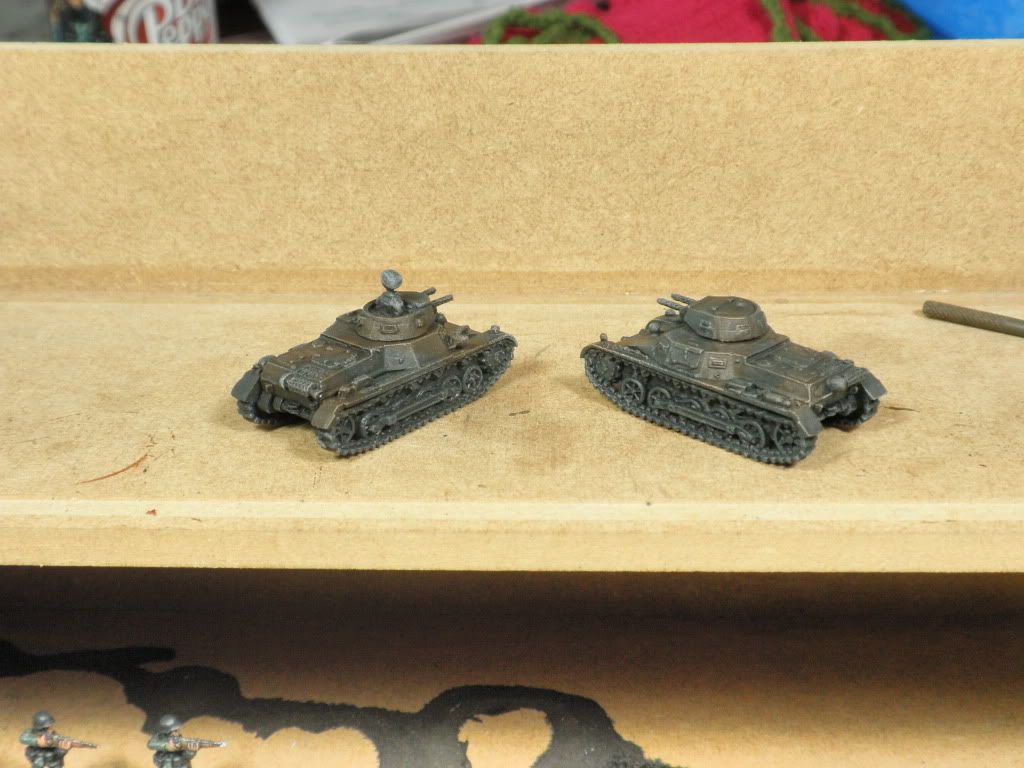
I based the paint scheme on this article from the Flames of War website. After highlighting the camo, I washed the models with Devlan Mud, which definitely toned down the brightness. I may actually go over them once more with the highlight color very lightly to bring out the edges a little more. Detail work will be next.
I based the paint scheme on this article from the Flames of War website. After highlighting the camo, I washed the models with Devlan Mud, which definitely toned down the brightness. I may actually go over them once more with the highlight color very lightly to bring out the edges a little more. Detail work will be next.
Tuesday, June 28, 2011
Halfway to D-Day
We're halfway there - and here is my army. From blisters to ready to paint in about a week, plus one platoon basically painted. Now it's time to get serious.
I tried out Devlan Mud and Badaab Black, and the result was pretty much identical. The brown went a little better on the khaki, so I figure I'll go with that. I'll post pics when I've gotten the platoon done.
Monday, June 27, 2011
Them are some BIG guns
The Buflas (Bunkerflaks) are built, and DAMN are they big. I'm not sure why, but I just didn't really understand how big these beasts are. Apparently they were built on a 12-ton(!?!) halftrack chassis. Keep in mind that tonnage ratings for transport vehicles are based upon what they can carry - the actual loaded weight according to the FoW website was 22 tons. That's a monster any way you slice it.
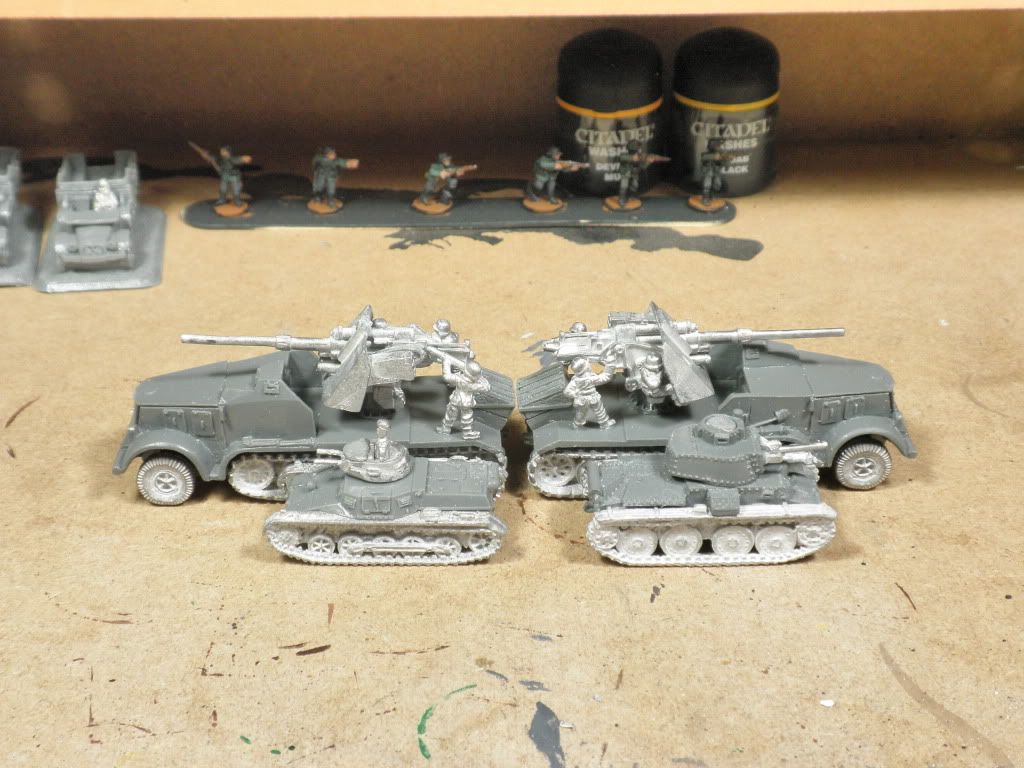
I've included a Panzer I and two Panzer 38(t)s for a sense of scale.
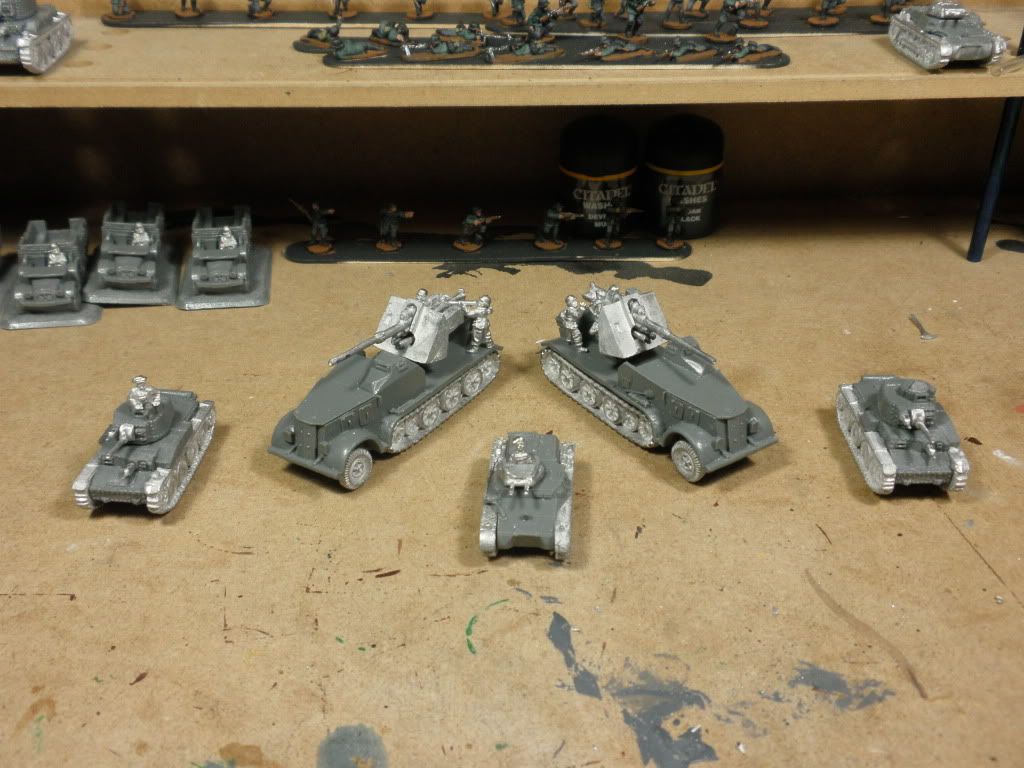
I'm nervous about the crew - I'd prefer to pin them with only the two tiny little feet as contact points, but the thin resin just can't handle any stress. And it would be a pain in the ass to put a pin into their legs. So one of the Buflas has the crew also glued to their guns. We'll see how secure they are.
I'm going to get the last of my models primed and sprayed tonight, then get cracking on finishing the paint jobs.
I've included a Panzer I and two Panzer 38(t)s for a sense of scale.
I'm nervous about the crew - I'd prefer to pin them with only the two tiny little feet as contact points, but the thin resin just can't handle any stress. And it would be a pain in the ass to put a pin into their legs. So one of the Buflas has the crew also glued to their guns. We'll see how secure they are.
I'm going to get the last of my models primed and sprayed tonight, then get cracking on finishing the paint jobs.
Panzers built, no dip
First off I decided against the dip. One critical part of dipping is a white primer to give you really bright colors, which are then dulled by the dip. Over a black primed model it would just get too bright. I instead went with an experiment between two of GW's washes, which I've used in the past to good effect. More on that later.
I now have built my panzers, the Panzer 38(t)s (which were grabbed from the Czechs after the Germans invaded them back in 1938 to no significant opposition due to the British and French giving the Sudetenland to the Germans, which had all of the Czech defenses in it) and the Panzer Is. They went together with minimal problems, though since I was watching Burn Notice at the time things went slowly.
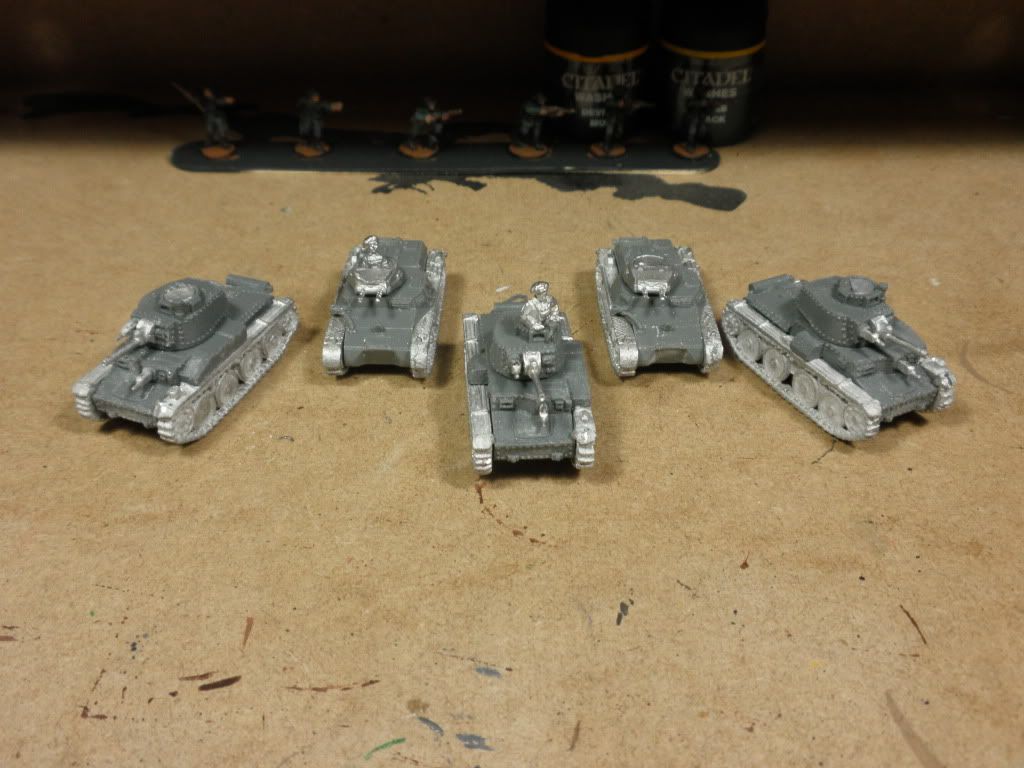
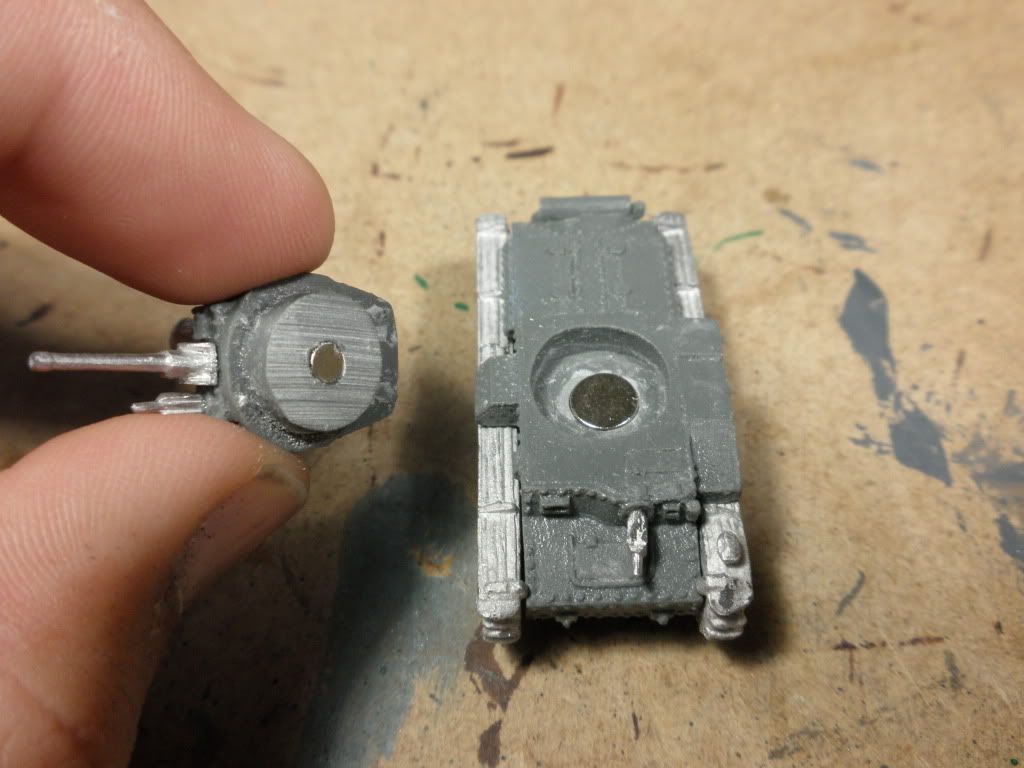
One interesting thing was that the Panzer Is were pre-molded for magnetization! How thoughtful! They were even perfectly sized for my large stash of "surplus" disc rare-earth magnets. I just popped them in and ready to go! The only problem was that these are pretty big rare-earth magnets. So it turns out that there was so much force holding them together that I could barely turn the turret or remove it. So I decided to put some spacers made out of the blister packaging in so they are more manageable. Still tough to separate them, though.
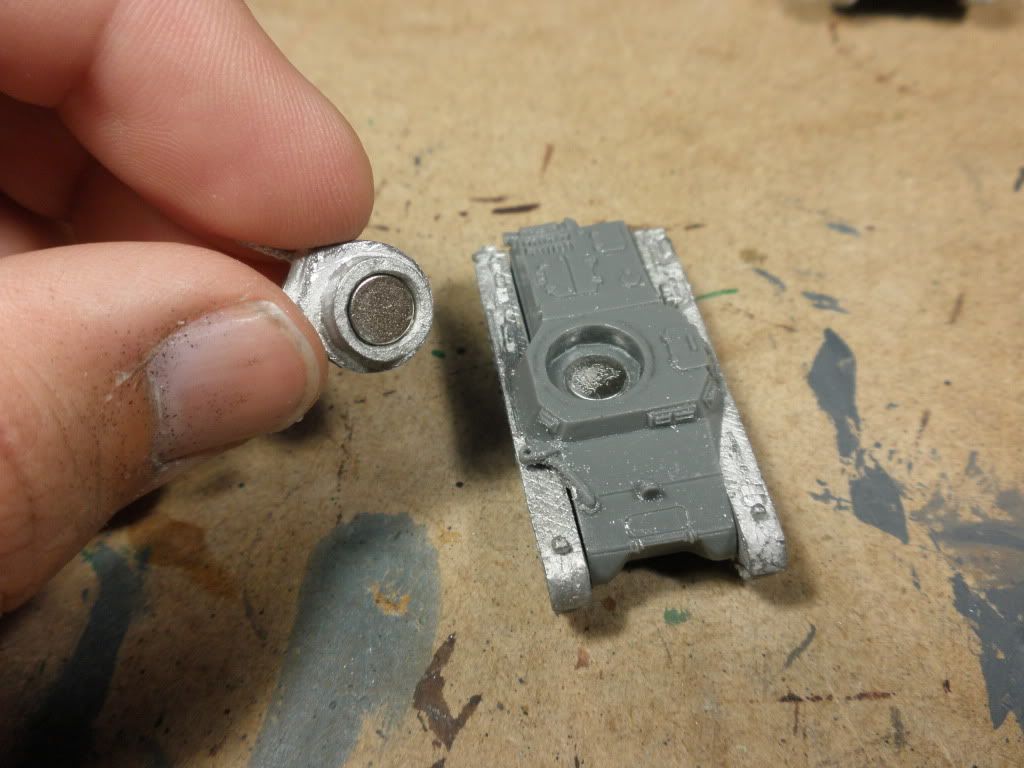
The 38(t)s were not pre-molded, so I had to whip out the Dremel and carve out the holes. However, this time I went the same way I went with my American tanks, with the surplus magnet on the hull and a smaller magnet on the turret. This doesn't have nearly the same excessive force as the Panzer Is, but they hold quite nicely. Took me a lot longer, and I had to be careful about the resin dust, but those are much more useable.
Next up: Bunkerflaks! I'm really looking forward to getting home from work.
I now have built my panzers, the Panzer 38(t)s (which were grabbed from the Czechs after the Germans invaded them back in 1938 to no significant opposition due to the British and French giving the Sudetenland to the Germans, which had all of the Czech defenses in it) and the Panzer Is. They went together with minimal problems, though since I was watching Burn Notice at the time things went slowly.
One interesting thing was that the Panzer Is were pre-molded for magnetization! How thoughtful! They were even perfectly sized for my large stash of "surplus" disc rare-earth magnets. I just popped them in and ready to go! The only problem was that these are pretty big rare-earth magnets. So it turns out that there was so much force holding them together that I could barely turn the turret or remove it. So I decided to put some spacers made out of the blister packaging in so they are more manageable. Still tough to separate them, though.
The 38(t)s were not pre-molded, so I had to whip out the Dremel and carve out the holes. However, this time I went the same way I went with my American tanks, with the surplus magnet on the hull and a smaller magnet on the turret. This doesn't have nearly the same excessive force as the Panzer Is, but they hold quite nicely. Took me a lot longer, and I had to be careful about the resin dust, but those are much more useable.
Next up: Bunkerflaks! I'm really looking forward to getting home from work.
Sunday, June 26, 2011
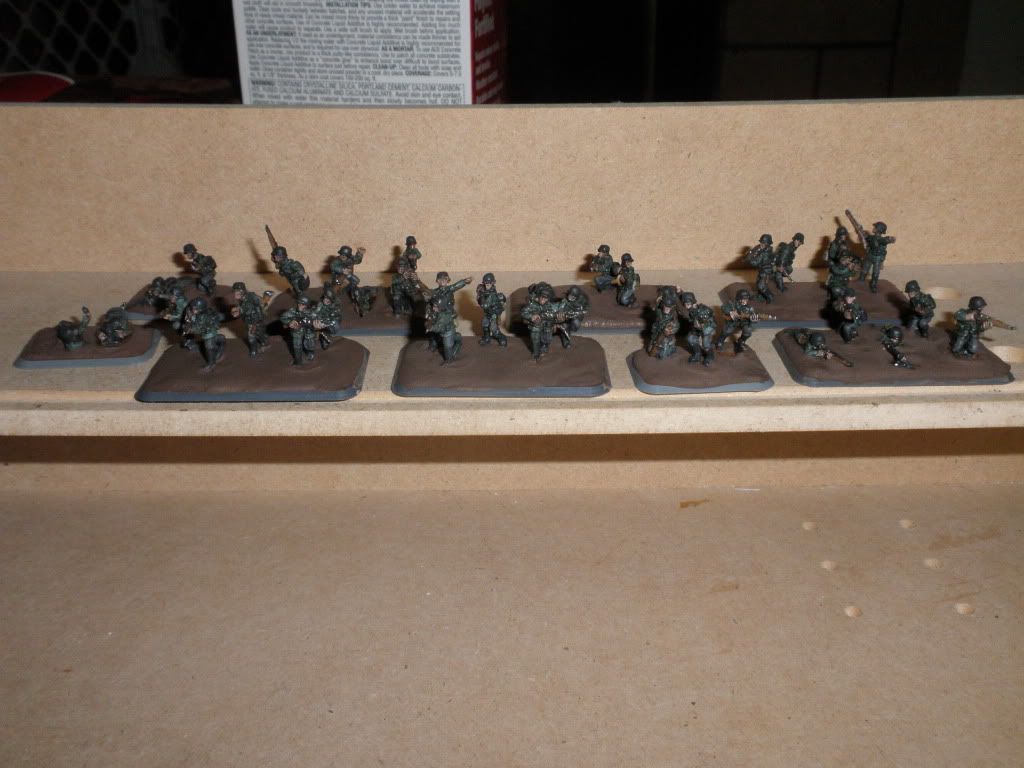
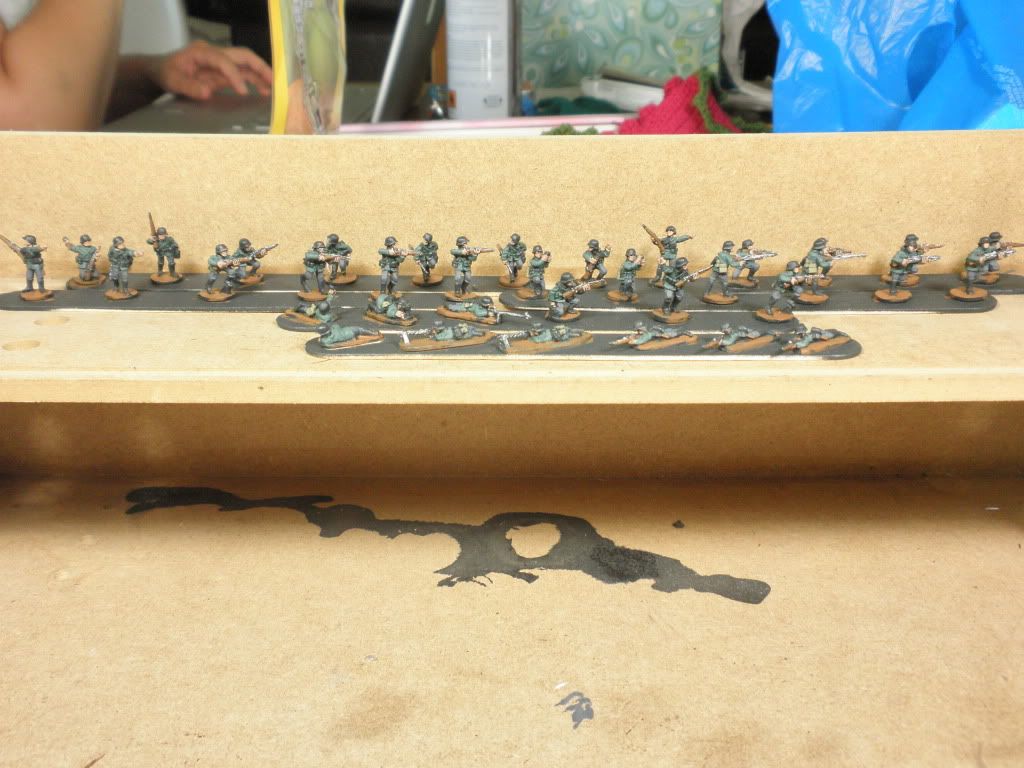
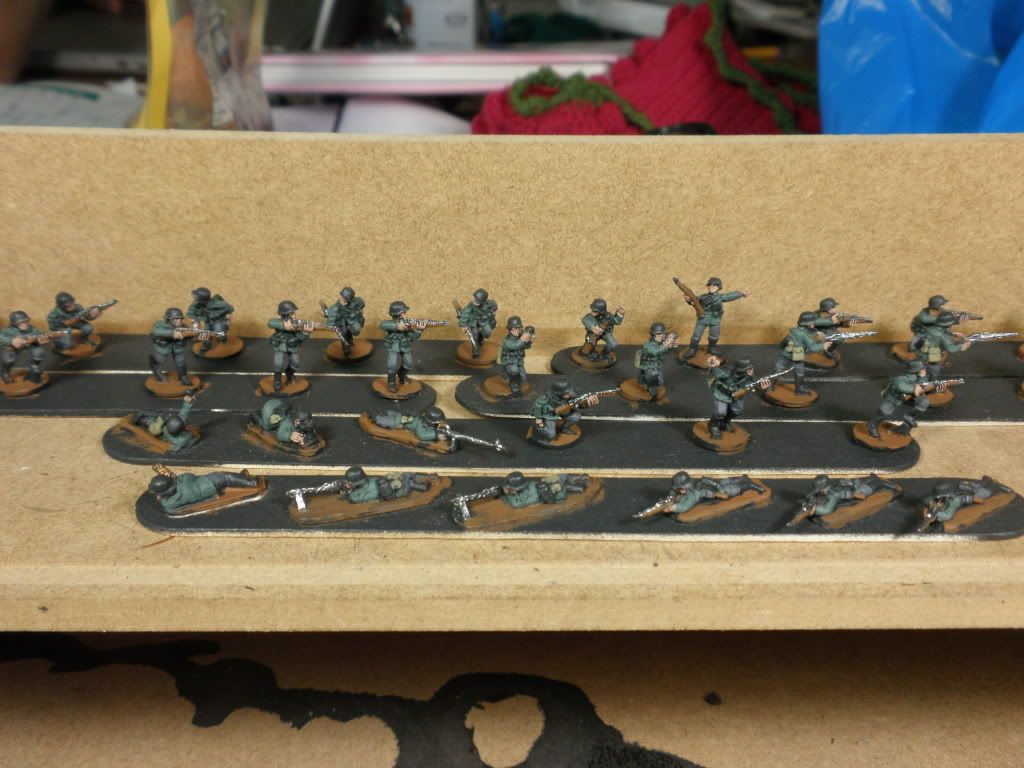
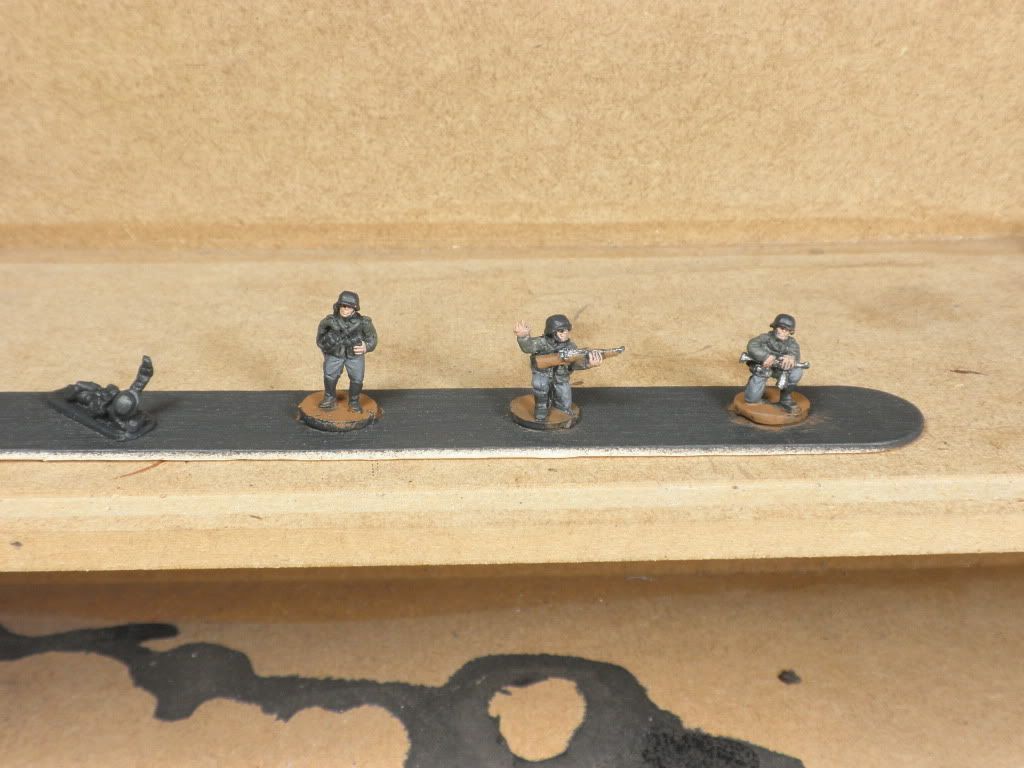
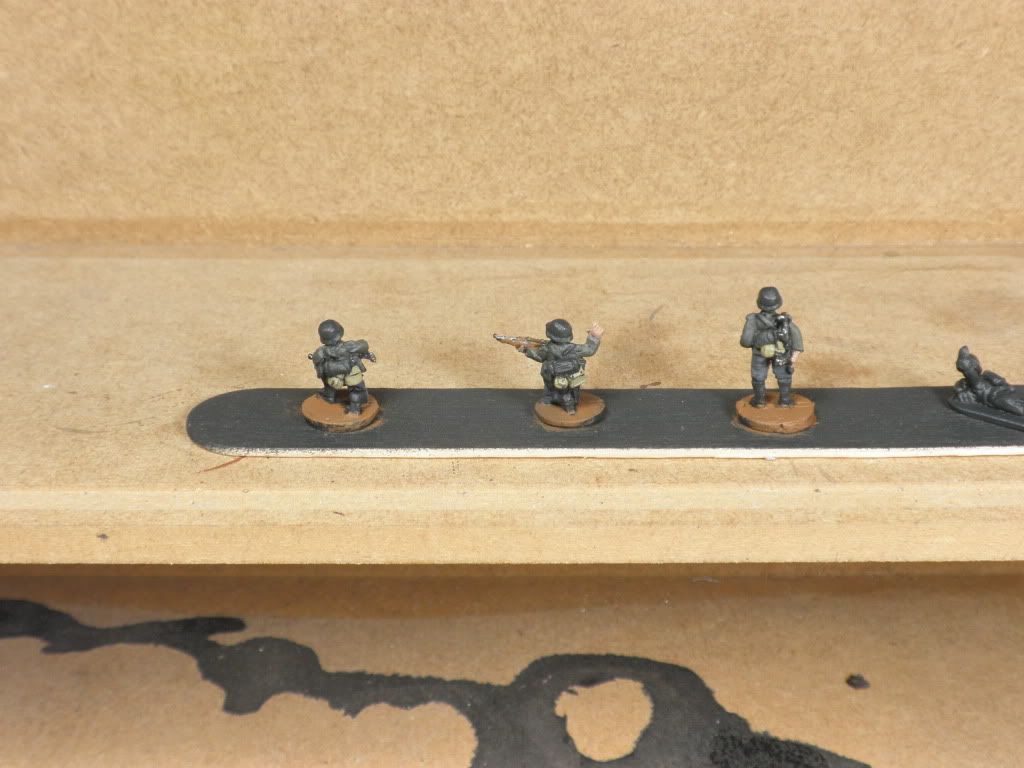
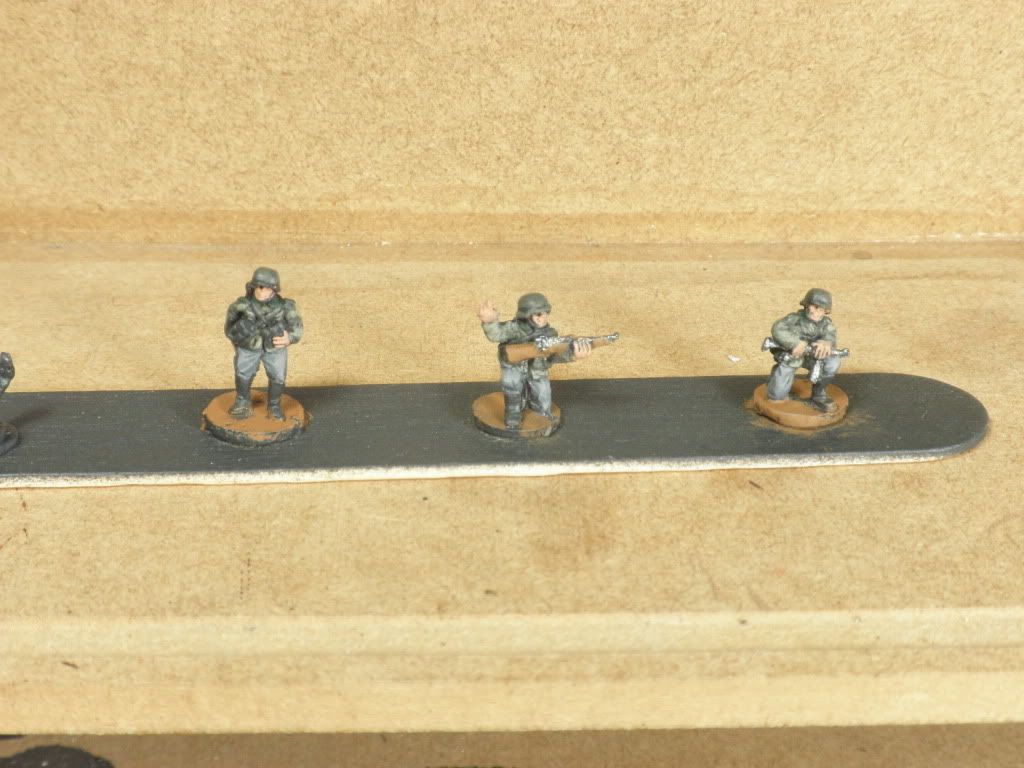
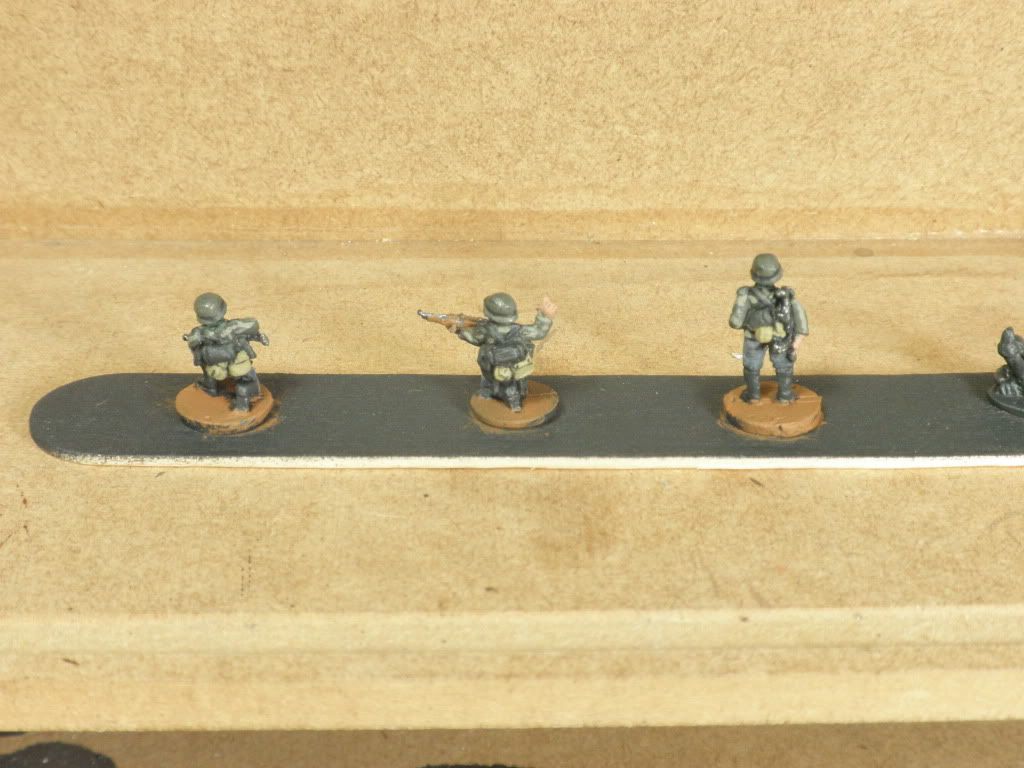
First Schutzen platoon done to basic standard
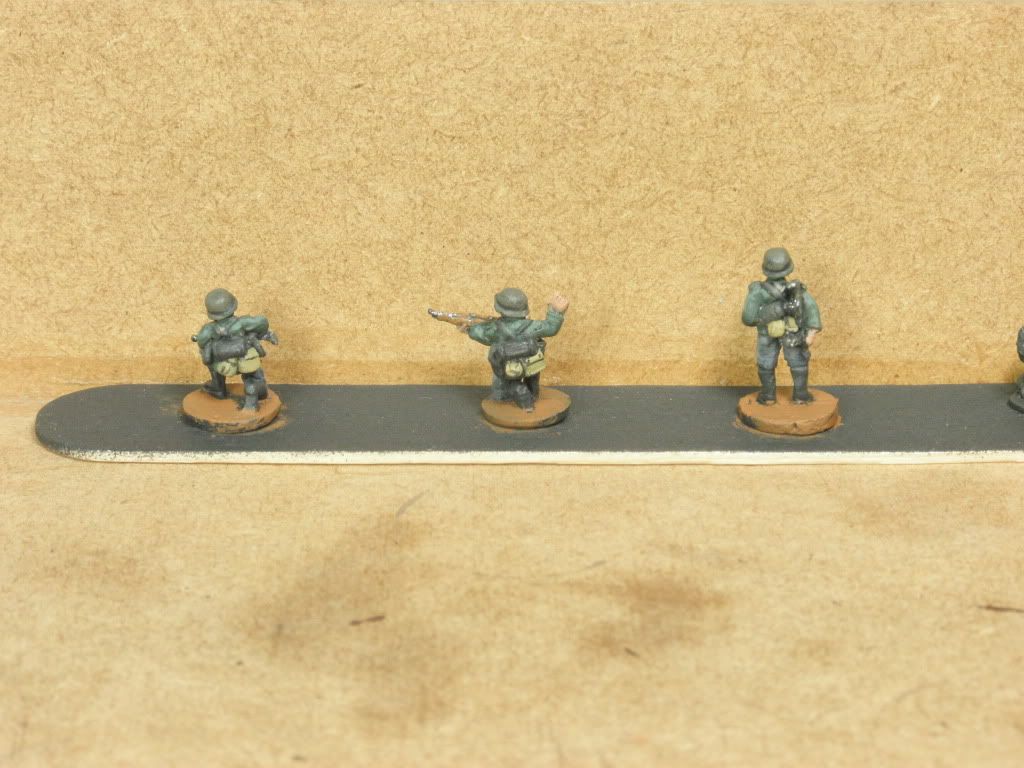
Well, the first platoon is done to the basic standard - block painted with all main areas covered, but no detail work or highlighting. Here are the results:
Paints used, in the order I painted them:
Tunics - Vallejo German Uniform 920
Pants - Citadel Foundation Adeptus Battlegrey
Metal - Vallejo Game Color Gunmetal Metal 054 (yes, it is a redundant name)
Wood and bases - Citadel Foundation Calthan Brown
Skin - Citadel Foundation Tallarn Flesh
Canteen and bread bag - Vallejo FoW Khaki 988
First off the popsicle sticks made a HUGE difference. I had to kind of figure out how to use them, but once I did they were awesome. The first stick I did the tunics on I painted each model on all sides and it helped, but not a lot. Then I tried doing one entire side, then shifting my grip on the stick and doing the other side. That was the trick. I cut the time I spent painting the tunics in half.
I also quickly decided to not worry about painting over the webbing suspenders. The detail is close to the model, so it was really hard to avoid getting paint on it and it was taking a lot of time. It won't take me nearly as much time to cover the straps with a bit of black paint later. On the other hand, I didn't paint over the pouches and the like. As I love to explain to my students, it is all about opportunity costs. I've got a limited amount of time to paint, so I can use that time painting base coats or detail. In the end, any time I spend on one I can't spend on the other. So if it takes me 30 seconds less to paint a model if I just paint over the straps, but it only takes me 10 seconds to re-paint the straps, then I'm gaining 20 seconds a model. With 150 models, that one change is saving me almost an hour. I can spend that hour painting Waffenfarbe (branch color on their shoulder straps) or rank insignia.
A little about my brushes. I have three "go-to" brushes for almost everything I do with 15mm infantry. I have a Citadel Standard Brush and two Vallejo kolinsky sable brushes, a 1 and a 2/0. The kolinsky brushes are amazing - they are incredibly precise, and seem to almost be able to read my mind, getting paint where it needs to be without even trying. On the other hand, this precision can be a bit of a pain when I want coverage. That's when I pull out the Citadel brush. That's made of cheaper squirrel hair, which doesn't have as much spring in it, so it flows around other detail more easily, and tends to get into deeper places that are hard to hit with the more precise kolinsky brushes. So most of this work was done with the Citadel brush, though the skin was with the kolinsky brushes, and I'll pretty much be using them for everything on the infantry but drybrushing from here on out.
Oh, and I won't use them for the next step - I'm going to try "the dip" for these guys. For those who don't know, that's using a polyurethane wood stain on them, which gets down into the crevices of the detail in a very even way, creating great faded shading. I'll try it on one stand of these guys, and report on the results. In the mean time, I've got all the infantry built and primed, so I think I'll start building my tanks!
Saturday, June 25, 2011
And the difference is...
Not a hell of a lot.
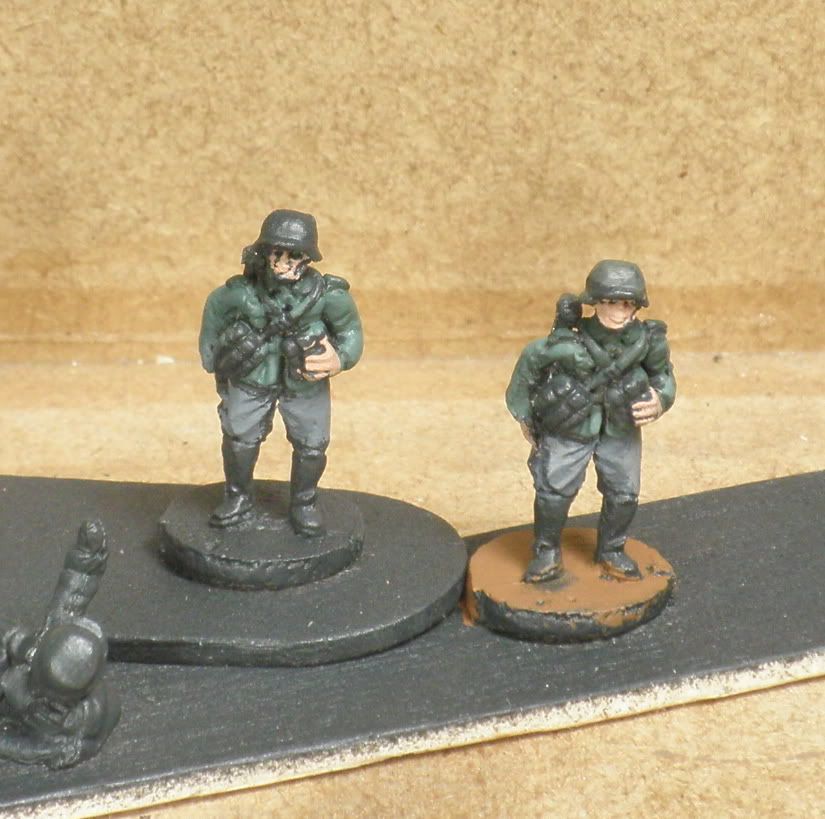
The model on the left is one I just painted using the German Uniform color I bought earlier today, along with the pants being the same Adeptus Battlegrey I had used as the basecoat for the other model. There is no highlighting on the left model. And it's kind of hard to tell the difference.
So I'll definitely go with the left model's paint scheme. I'll think about some kind of wash or "dip" after I've gotten everything looking decent, but that's getting into the "nice if I can get there" area. But with how easy it was to get this level done, I foresee getting a lot of these guys done to this basic level within a few days.
Testing with mixed paints
Normally I hate mixing paints. It's a huge pain to try to get consistent colors, and if you can't get everything done in the time your paint dries on the palette you're making a new batch. But since the store isn't open and I wanted to see how this would look, I decided to try mixing Feldgrau with Orkhide Shade, the bluish-green I'm using for the collars and shoulder loops, to try to approximate the feldgrau green-grey of the early war. I then added some Grey-Green 886 to the mix for a highlight.
I think it came out pretty good, and I like the overall effect. I'll see how closely it resembles the actual German Uniform color, and I'll still get the German Uniform paint, but it's good to know the look will work.
I think it came out pretty good, and I like the overall effect. I'll see how closely it resembles the actual German Uniform color, and I'll still get the German Uniform paint, but it's good to know the look will work.
Reset!
OK, I'm already glad I'm on the Interwebz. Thanks to Dave Ripperda, a fine upstanding fellow Finn player from Sac, I now know that Battlefront screwed up its colors in the painting guide in the Blitzkrieg rulebook. I need to buy some paints, specifically Vallejo German Uniform 920, since while the color was called feldgrau the actual composition of it changed over time. It was a fairly deep green in 1940, while by 1943 it had become almost a grey-brown. The Vallejo color of the same name is closer to the latter. So I'll be picking up the actual paint later today. For one thing I like the new color because it is brighter, so my troops will look more interesting on the table. The helmets I'm a little less clear on. I might go with more of a dark grey highlight, like Chardon Granite, but I'll have to see how it turns out with the new uniform color. In the mean time, I'll get started on the pants if I have time while I'm taking care of Maike this morning.
Friday, June 24, 2011
Test painting done on basics
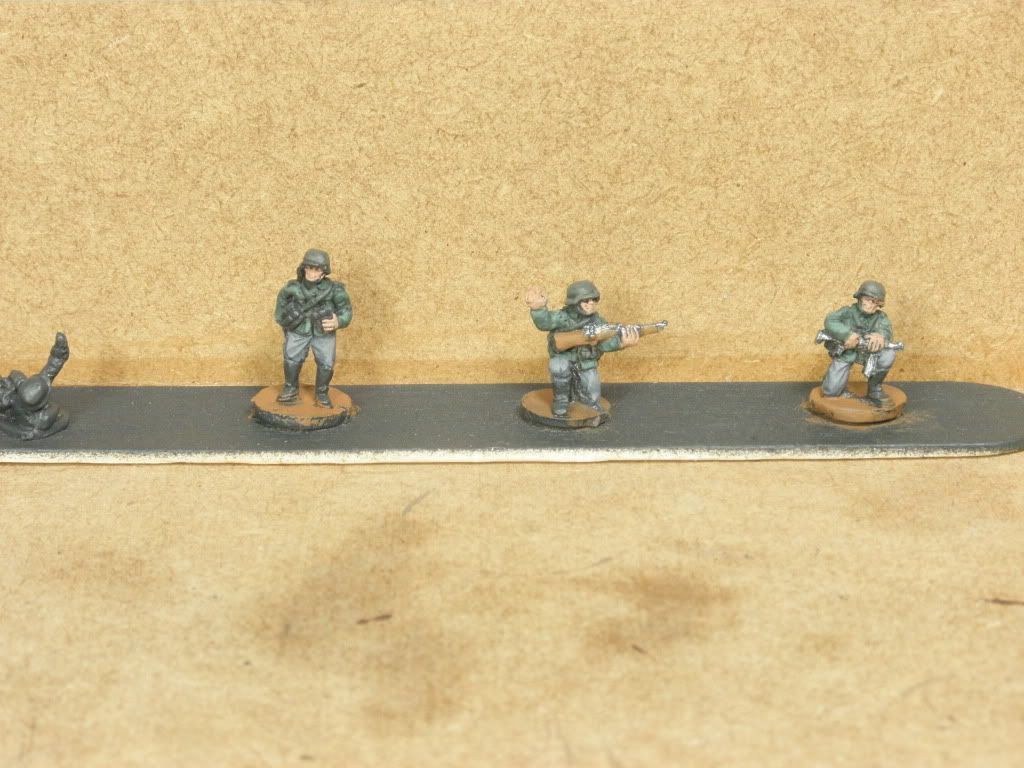
So I tried it out, and first off, DANG these guys could end up being dark. I definitely want to avoid that. So here they are with just block painting.
I left the helmet, boots, and webbing the German Grey Armor, painted the tunic Feldgrau, the pants Adeptus Battlegrey, the bread bag and mess kit Vallejo FoW Khaki, the metal Vallejo Gunmetal, and the rifle stock and bases Cathayan Brown. I mostly did the base to contrast the model, since they were so dark.
However, they were SO dark I decided to try lightening them up, so I went a step further and did some highlighting and a touch of detail.
I did the collars Orkhide Shade (they are described as being "bottle green" in the reference materials I've found), and highlighted the tunics with Vallejo FoW Grey Green. The pants were highlighted with Codex Grey.
After doing this, I can see a small amount of wash, but I don't think dipping these guys is a good solution. They're so dark already, unless I'm going to really go overboard on the bright colors I'll just end up repainting them. I'll wash the faces and khaki bits, but otherwise some highlighting should be plenty. I'll just leave the darker colors showing for shade effect.
Infantry prepped, ready to start painting
I've got my infantry filed and put on the sticks, and about 2/3 of the models primed and base coated. Boy, the "German Armor" is almost the same as black, but when viewed under a daylight lamp it IS actually a grey instead of black.
I still need to build my armored vehicles, but that should go pretty quick. I'm now ready to start doing some painting. I figure I'll do my anti-tank rifle team as a start since I have additional models if I screw it up. Time to get painting!
Thursday, June 23, 2011
Second Schützen platoon done
My second Schützen platoon is cleaned, along with my MG platoon, and man was that a pain. The trucks were a snap (even if with the resin sculpt you can see where the drivers legs should be, so the entire company will be driven around by dual amputees...), but the casts of the infantry were abysmal. Tons of gloopy flash, semi-lined up molds, just a mess. I also got it all done this morning, which I had slated for priming. Ah, well, I'll probably just prime all of the infantry and the like at the same time, that's not a major time consumer.
Next up: mortars and AT guns. I'm kind of dreading the mortars, since they're from the same batch of casts as the Schützen, but my AT guns are all Old Glory, so there shouldn't be the same level of suck. I'll start my tanks once I've gotten my infantry to a basic level painting wise, then once everything is based I'll work on details. With luck and effort, I'll be ready for the tanks next Monday.
Wednesday, June 22, 2011
First steps
Well, I'm a little behind by not by much. I spent a lot of time last night planning, so ironically I didn't get done what I had planned to do. I figure I've got two times to really get stuff done: before I go to work (I leave around 11:30) and after Maike goes to bed. Anything involving drying or spraying I'm going to do in the mornings and let the summer heat take care of that for me, and building and the like I'm trying to do in the evening.
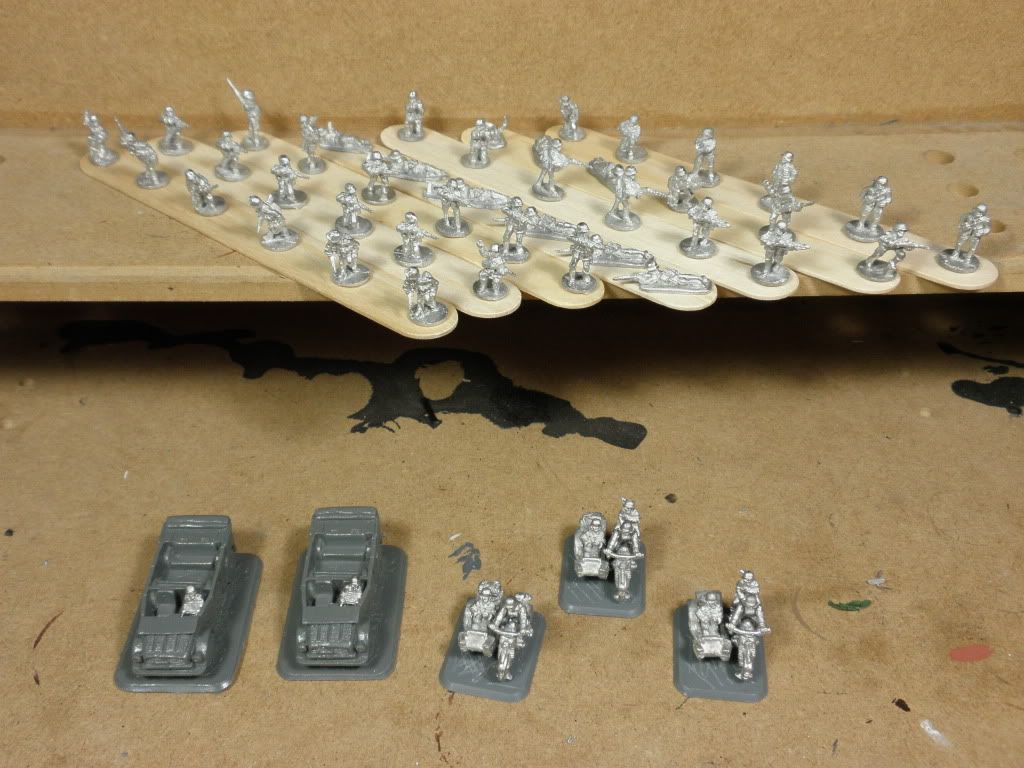
Or that was the plan. Instead, the fiddly bits slowed me down considerably. But as of 10:30 this morning, I have this done:

The field cars and motorcycles are built, and the first Schützen platoon is ready to paint. I decided to try a different technique for painting and basing after some research. I'm putting the cleaned infantry models onto popsicle sticks with a dab of superglue, and I'll prime and paint them there. After they're done, I'm going to mix up some concrete patch with some brown house paint I have left over from terrain building I did a while ago. Put that on the bases, stick the models in, cover the bottoms of the models, and there you go! After that dries, I'll cover it with static grass instead of my usual drybrush and bits of grass.
The biggest issue I had were the fiddly bits. Specifically, the motorcycle drivers were a PAIN to put together. I'm still probably going to have to clean up around their arms once they've set. It took me a lot longer to get that done than I'd thought. Secondly, I was really disappointed with the quality of the casts of the Schützen platoon. There were a lot of heavy mold lines where the mold clearly didn't completely match up, plus big boogers of flash that would obscure some of the detail. When you've got to file off mold lines that heavy in a scale like this, you're losing detail, period. I actually can't use one of the MG loaders because the entire front of the model is only semi-cast, with no face and the arms melting. I sent an email to customer service about it - they've been good about replacing stuff like that. Sadly, I don't know if it will come in time to do any good.
I finally just figured I'd do the obvious and easy stuff like the helmets and the larger glops and leave the small mold lines alone. I had hoped to get all of this primed today, but I'll hold off and prime it tomorrow with more of my infantry. That's it for now! Off to shower and go to work.
Or that was the plan. Instead, the fiddly bits slowed me down considerably. But as of 10:30 this morning, I have this done:
The field cars and motorcycles are built, and the first Schützen platoon is ready to paint. I decided to try a different technique for painting and basing after some research. I'm putting the cleaned infantry models onto popsicle sticks with a dab of superglue, and I'll prime and paint them there. After they're done, I'm going to mix up some concrete patch with some brown house paint I have left over from terrain building I did a while ago. Put that on the bases, stick the models in, cover the bottoms of the models, and there you go! After that dries, I'll cover it with static grass instead of my usual drybrush and bits of grass.
The biggest issue I had were the fiddly bits. Specifically, the motorcycle drivers were a PAIN to put together. I'm still probably going to have to clean up around their arms once they've set. It took me a lot longer to get that done than I'd thought. Secondly, I was really disappointed with the quality of the casts of the Schützen platoon. There were a lot of heavy mold lines where the mold clearly didn't completely match up, plus big boogers of flash that would obscure some of the detail. When you've got to file off mold lines that heavy in a scale like this, you're losing detail, period. I actually can't use one of the MG loaders because the entire front of the model is only semi-cast, with no face and the arms melting. I sent an email to customer service about it - they've been good about replacing stuff like that. Sadly, I don't know if it will come in time to do any good.
I finally just figured I'd do the obvious and easy stuff like the helmets and the larger glops and leave the small mold lines alone. I had hoped to get all of this primed today, but I'll hold off and prime it tomorrow with more of my infantry. That's it for now! Off to shower and go to work.
Tuesday, June 21, 2011
Gotta get motivated again
It has been way too long since I've updated this blog, but I figure this is a time to do it. I've got two weeks until I am in Pennsylvania for Historicon 2011 and the Early War Nationals for Flames of War. I figure I'll completely get my butt kicked, but I really want to play, and that means I need to get my army ready! And here it is:
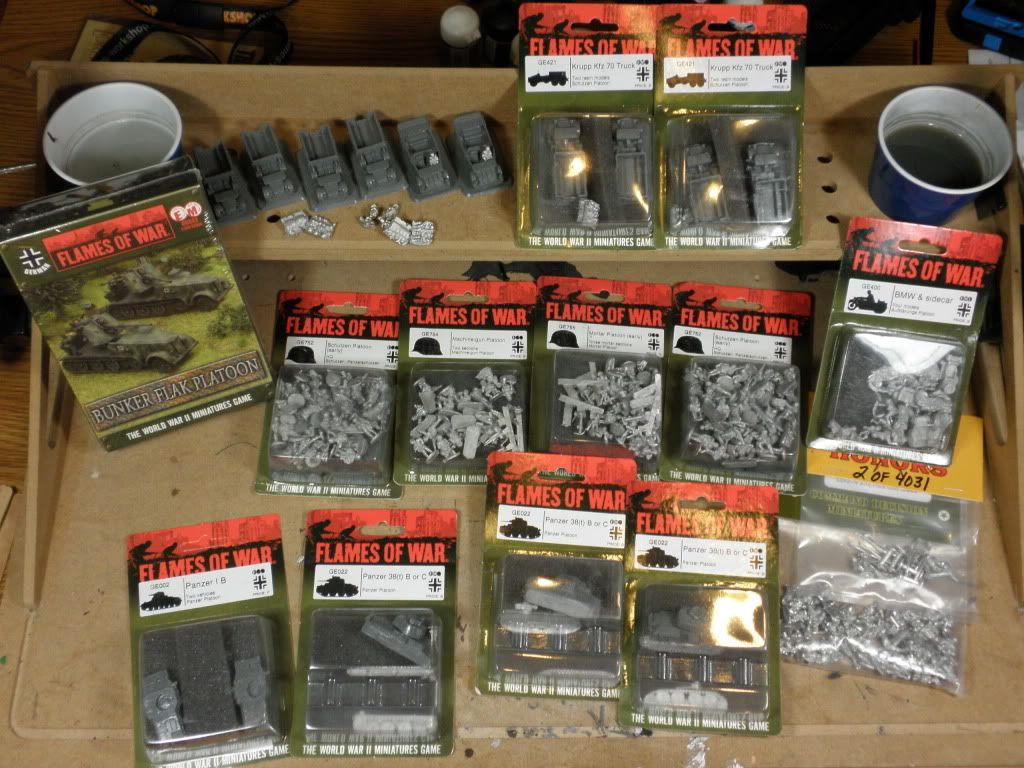
Yep, it is almost completely in blisters. Nothing is built. It's a German Schützenkompanie, and I want it playable by the time I leave. Time to get cracking! I'll track my progress here.
Oh, and here is the list:
HQ:
CiC SMG, 2iC SMG, 2x Motorcycle and Sidecar
Combat Platoons:
Schützen Platoon: Cmd MG, 6x MG, Light Mortar, Anti-Tank Rifle, Kfz 15 Field Car, 4x Kfz 70 Truck
Schützen Platoon: Cmd MG, 6x MG, Light Mortar, Kfz 15 Field Car, 4x Kfz 70 Truck
Schützen Machine-gun Platoon: Cmd SMG, 4x HMG
Weapons Platoons:
Schützen Mortar Platoon: Cmd SMG, 4x 8cm Mortars
Schützen Anti-Tank Gun Platoon: Cmd SMG, 3x 3.7cm PaK36
Support Platoons:
Anti-Tank Gun Platoon: Cmd SMG, 3x 3.7cm PaK36
Czech Panzer Platoon: 3x Panzer 38(t) B, 2x Panzer I
Bunkerflak Platoon: 2x 8.8cm FlaK 18 Sfl
Points: 1750
Platoons: 8
Subscribe to:
Posts (Atom)